Quantcast
Channel: Kerala Recipes
Viewing all 64 articles
Browse latest View live

Kakka Irachi Ularthiyathu (Stir Fried Clam Meat)

$
0
0

I have not been a fan of Clams (Kakka Irachi) and Mussels. I remember my Mom making Kakka Irachi during my school days and I couldn’t stand the sight of it. However, my Dad & brother would happily indulge as if it were the tastiest dish on earth. After getting married, I don’t remember hubby mentioning Clams in our house and so I never bothered to try it out. However during our visit to Kerala, hubby’s mom took the pains of making Kakka Irachi Ularthiyathu (Stir Fried Clam Meat). The sight of it brought back old memories and I didn’t want to taste it but hubby raved about it. So, I gave it a try reluctantly. Well, I was surprised. It wasn’t bad. Hmmm, not bad after all!
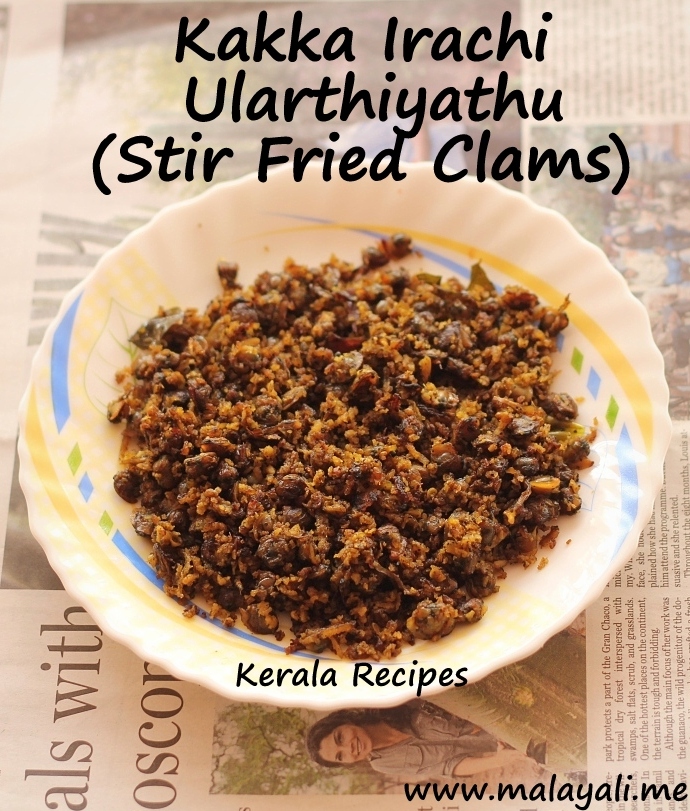
Kakka Irachi Ularthiyathu (Stir Fried Clams)

Kakka Irachi Ularthiyathu

I mean it isn’t going to be my favorite food but sure I could make it once in a while. Give me shrimp and I could eat it any day. Wait, I like the Stuffed Clams which we get at Seafood Restaurants but maybe because it tastes entirely different from the Kerala Style Kakka Irachi.
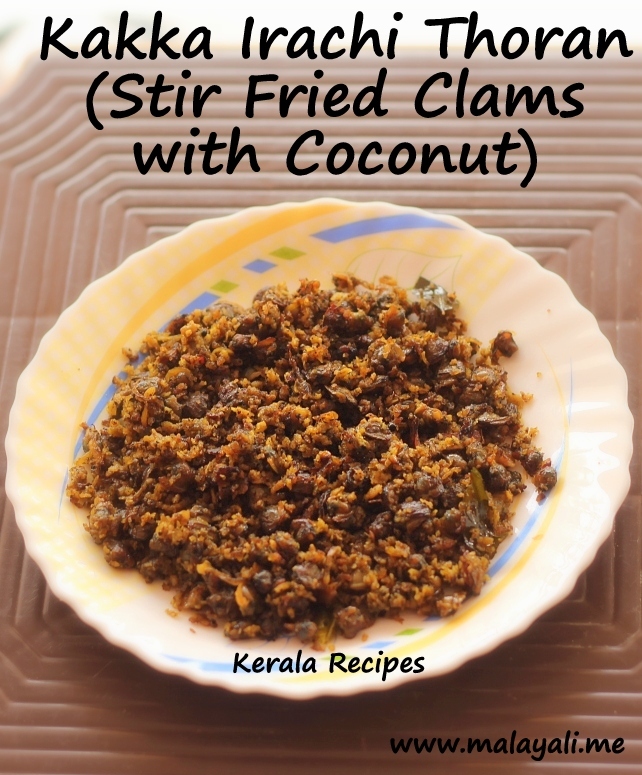
Kakka Irachi Thoran

Kakka Irachi Thoran

And so here is the recipe for another delicacy from Kerala – Kakka Erachi Ularthiyathu. This is very similar to Kakka Irachi Thoran since this recipe uses lots of coconut. Kakka Irachi tastes best when it is stir-fried in oil until it becomes brown and slightly crispy just like Beef Ularthiyathu. Don’t skimp on the black pepper powder because it makes this dish special. I don’t know if it’s true but many people have told me that Kakka Irachi is high in Calcium and so I should be eating it!

Ingredients

  1. Kakka Irachi (Meat of Clams/Mussels) – 1 lb or 1/2 kg (Removed from Shells)
  2. Sliced Shallots – 1.5 cups
  3. Crushed Garlic – 4 big cloves
  4. Crushed Ginger – 1″ inch
  5. Curry Leaves – 2 sprigs
  6. Slit Green Chillies – 3 to 4 (Alter according to your spice tolerance)
  7. Turmeric Powder – 1/2 tsp
  8. Chilly Powder – 1/2 tsp (Alter according to your spice tolerance)
  9. Coriander Powder – 2 tsp
  10. Black Pepper Powder – 1 tsp + 1 tsp
  11. Grated Coconut – 1 cup
  12. Coconut Oil – 1.5 tbsp + 1 tbsp
  13. Water – 2 tbsp
  14. Salt – to taste
  15. Garam Masala Powder – 1/2 tsp (optional)
  16. Fennel Seeds Powder – 1/4 tsp (optional)

Preparation Method

  1. Clean the Mussels thoroughly by pinching out the greyish-black grit found inside each Mussel. Wash it in plenty of water to remove any dirt and grit. Squeeze the mussels to remove water and keep it aside.
  2. Heat 1.5 tbsp oil in a man chatti (clay pot). Throw in the shallots, garlic, ginger, green chillies and a sprig curry leaves. Saute until the shallots begin to brown.
  3. Reduce heat and add 1/2 tsp turmeric powder, 1/2 tsp red chilly powder, 2 tsp coriander powder and 1 tsp black pepper powder. Saute for a few minutes.
  4. Add the cleaned Mussels to the pan along with the grated coconut and salt to taste.
  5. Sprinkle 2 tablespoons of water and mix everything. The clams will let out water as it gets cooked. Cover and cook on medium heat for around 12-15 minutes, stirring occasionally.
  6. Open the pan and stir fry the mussels on medium-high heat for 5-7 minutes, adding 1 tbsp of oil little by little while the meat gets browned.
  7. Sprinkle 1 tsp of black pepper powder. Throw in one more sprig of curry leaves and stir fry for a minute. Remove from heat when the clams have become slightly crispy and dry.

Note

  • For a variation, you can add a little garam masala powder and fennel seeds powder while the clams get cooked.
Ragi Puttu (Steamed Finger Millet Cakes)

$
0
0

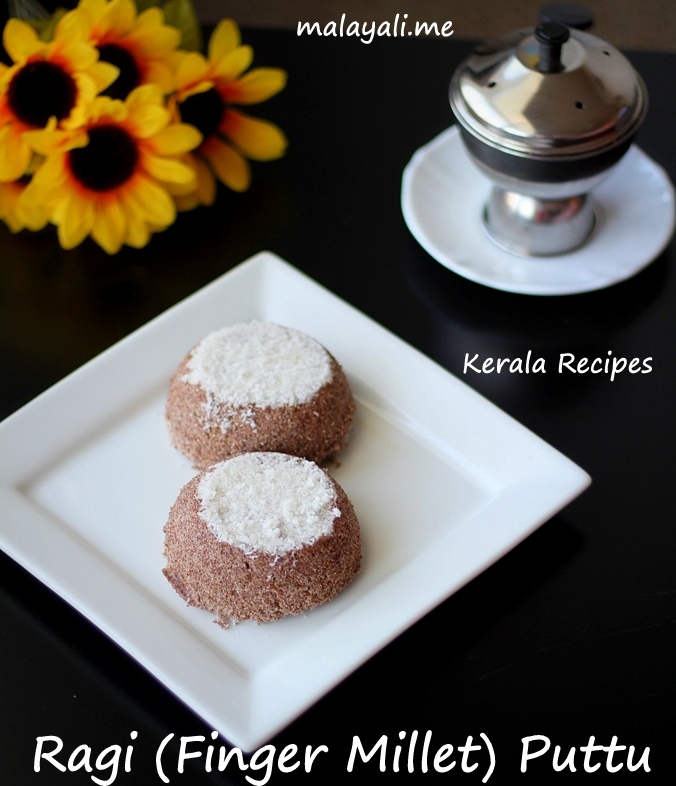
Let me introduce a gluten-free cereal on my blog called “Ragi” or “Finger Millet“. It is known as “Panji Pullu” in Malayalam. Ragi is widely grown and consumed in India. Once considered to be poor man’s companion, Ragi is now well-known for it’s nutritional benefits. Ragi Flour is made into a porridge (Kurukku) and given to infants because of its high nutritional content.

Ragi (Finger Millet) Puttu

Ragi (Panji Pullu) Puttu


My mom doesn’t remember feeding me Raagi as an infant but my adorable nephew likes Ragi Kurukku. Seeing him eat Ragi without any objections made me want to try Ragi in my diet. Of course, I decided to make the popular Kerala Puttu using Ragi Flour. I was worried if it would have a strong taste but I was happy with the results. It tasted very similar to Rice Puttu. Hubby liked it and now Ragi Puttu is seen frequently on our Breakfast table.

Steamed Finger Millet Cakes

Steamed Finger Millet Cakes

Finger Millet is high in fibre, calcium and iron. It can be used instead of wheat by those who have celiac disease. There are many different Indian recipes which use Ragi like Dosa, Idli, Roti, Laddu and so on.

Serves: 2

Ingredients

  1. Ragi (Finger Millet) Flour – 1.5 cups (I used Double Horse brand)
  2. Grated Coconut – 1/4 to 1/2 cup
  3. Salt – 1/4 tsp
  4. Crushed Cumin (Jeerakam) – 1/4 tsp
  5. Water – 1/2 cup approx

Preparation Method

  1. Take ragi flour in a bowl. Add 1/4 tsp of salt and crushed cumin to the bowl. Combine everything with your hands.
  2. Sprinkle 1/2 cup of water little by little and start mixing the ragi flour with your hand. Be careful while adding water. The flour should get wet yet retain a powdery consistency. If you add too much water it will change into a dough. When done, you should be able to roll the flour into a ball with a tight fist but it should powder back when crumbled.
  3. Pulse the wet flour in a mixie or spice grinder so that there are no lumps. The flour will become fluffy and aerated.
  4. Bring 1 cup water to a boil in a Pressure Cooker. Add 2 tsp of grated coconut to the bottom of the Chiratta Puttu Kutti (utensil for holding the flour). Follow with spoonfuls of ragi flour till you almost fill the Puttu Kutti. Top with 1 tsp coconut.
  5. Steam for around 3-4 minutes so that it is fluffy and cooked. Serve with Banana or any spicy curry like Kadala Curry.
Note

  • It is important to get the right consistency while mixing the flour with water. If you add too little water, the flour will be dry and will not hold shape after it has been steamed. If you add too much water, it will change into a dough and you will not get a fluffy Puttu.
  • Here is the picture of a Chiratta Puttu Kutti – utensil shaped like a halved-shell of a coconut. I use this more often than my regular Puttu Kutti since the contents get cooked  quickly.
Chiratta Puttu Kutti

Chiratta Puttu Kutti

Chemmeen Ularthiyathu (Kerala Style Sauteed Prawns)

$
0
0

Give me shrimp any day and I am a happy woman! On our recent trip to the Asian Market, we were able to lay our hands on a treasure chest – yes, a chest filled with different kinds of jumbo shrimp. I scooped out plenty of those little monsters into bags and dreamed of making some good, spicy Chemmeen Ularthiyathu.

Naadan Chemmeen Ularthiyathu/Olathiyathu

Chemmeen Ularthiyathu

Chemmeen Ularthiyathu is a dry preparation of Shrimp/Prawns which used Fish Tamarind (Kudam Pulli). Coconut Slices are often added to increase the quantity of the final dish and it also enhances the taste of the dish. I didn’t have coconut slices but try to use them if you can. These Kerala Style Stir Fried Shrimps have the perfect balance of sourness and hotness. One of the things I have learned about Kerala Cuisine is that you don’t need too many ingredients to make a good dish. This recipe doesn’t use many spice powders but it tastes awesome.

Kerala Style Sauteed Shrimp/Prawns

Kerala Style Sauteed Prawns

Ingredients

  1. Shrimp/Prawns (Chemmeen) – 1 lb or 1/2 kg approx
  2. Lemon Juice – 2 tsp (for cleaning)
  3. Fish Tamarind (Kudam pulli) – 4 small pieces
  4. Water – 1/2 cup

For Marinating the Shrimps

  1. Turmeric Powder – 1/4 tsp
  2. Red Chilly Powder – 1 tsp (Alter according to your spice tolerance)
  3. Black Pepper Powder – 1/4 tsp
  4. Salt – to taste
  5. Sliced Shallots – 1/2 cup
  6. Slit Green Chillies – 2 or 3
  7. Crushed/Minced Ginger – 1.5 tbsp
  8. Crushed/Minced Garlic – 1.5 tbsp
  9. Curry Leaves – a big sprig
  10. Small Coconut Slices (Thenga Kothu) – 1/2 cup

For Stir Frying the Shrimp

  1. Sliced Shallots (Kunjulli) – 1 cup
  2. Minced Ginger – 1.5 tbsp
  3. Minced Garlic – 1.5 tbsp
  4. Curry Leaves – 2 sprigs
  5. Red Chilly Powder – 1/2 tsp
  6. Black Pepper Powder – 1/4 tsp
  7. Kashmiri Chilly Powder – 2 tsp
  8. Coconut Oil – 2 tbsp
  9. Mustard Seeds – 1/4 tsp

Preparation Method

  1. Remove the head, shell and tail from the shrimp and devein it. Soak the shrimp in water along with 1 tsp lemon juice for 3-5 minutes. Wash and drain.
  2. Marinate the shrimps with 1/4 tsp turmeric powder, 1 tsp red chilly powder, 1/4 tsp black pepper powder and salt to taste. Using your hands, combine the remaining ingredients (5 to 10) with the shrimp and keep it aside for half an hour.
  3. Wash the fish tamarind and soak it in 1/2 cup of warm water for 15 minutes. Alternatively, you can microwave the fish tamarind for 30 secs so that it softens.
  4. Transfer the marinated shrimp to a Meen Chatti (earthern pot) or any deep pan. Wash any left over marinade with a few tablespoons of water and pour it into the chatti/pan. Add the fish tamarind to the pan along with the water used for soaking.
  5. Cover and cook the shrimp on medium heat for 10-12 minutes, stirring occasionally.
  6. Open the pan and continue cooking on medium-high heat so that most of the gravy dries up. Remove from heat.
  7. Heat 2 tbsp coconut oil in another pan. Splutter mustard seeds. Throw in the shallots and saute until it becomes translucent.
  8. Add the ginger, garlic and curry leaves. Continue sauteing so that the shallots begin to brown.
  9. Reduce heat and add 1/2 tsp chilly powder, 1/4 tsp black pepper powder and 2 tsp Kashmiri Chilly Powder. Saute for 2 minutes.
  10. Add the cooked shrimps along with it’s masala to the pan. Wipe any leftover masala with a few teaspoons of water and add it to the pan. Add more salt if needed.
  11. Saute for 7-8 minutes so the prawns are roasted thoroughly.

Note

  • Do not discard the heads, shells and tails. You can use it for making Seafood Stock (recipe to follow).

Apple & Coconut Chutney/Chammanthi

$
0
0

Sometimes I prepare a new dish, take couple of photos, prepare a mental note for posting the recipe but unfortunately after several days, I forget about the ingredients used and how I made the dish. These days, I am trying to remind myself to jot down the recipe on a piece of paper so that it helps with my brain fog. ;)

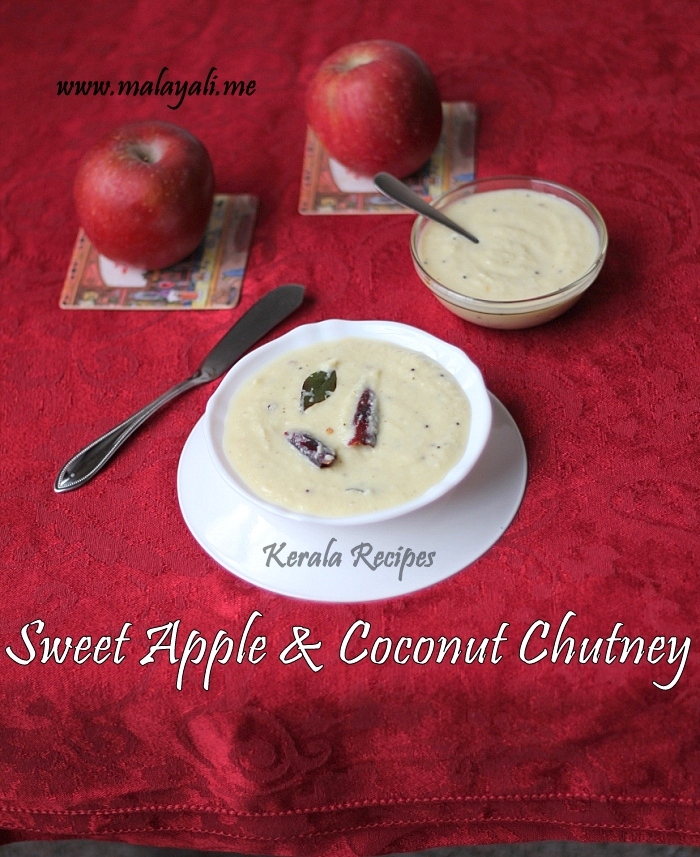
Sweet Apple and Coconut Chutney

Sweet Apple and Coconut Chutney


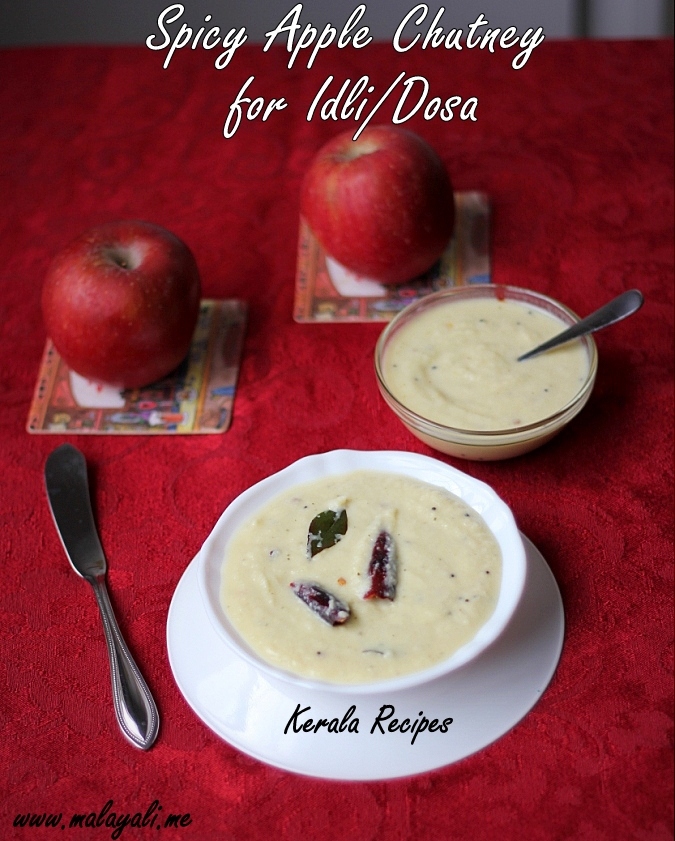
I usually buy Organic Apples in bulk and sometimes I don’t know what to do with too may apples lying around in my kitchen! On one such day, I decided to try an Apple Chutney with Coconut. I was totally blown away by the results. This mildly sweet, tangy and spicy chutney tasted fabulous. We had this Apple Chutney (Chammanthi) with Brown Rice Dosa and hubby was impressed. This recipe is a keeper. I will be making this Chutney more often as an accompaniment to Idli and Dosa (Dosha).

Sweet & Spicy Apple Chutney (Chammanti)

Sweet & Spicy Apple Chutney (Chammanti)

I guess you can turn many fruits and vegetables into a Chutney using Coconut. My aunt makes Sour Grapes Chutney (Munthiri Chammanthi) using unripe grapes and it tastes just like Mango Chammanti which we have with rice.

Ingredients

  1. Sweet Red Apples (Peeled & diced) – 2 medium
  2. Grated Coconut – 1/2 cup
  3. Indian Green Chillies – 2 (Alter according to your spice tolerance)
  4. Peeled Ginger – a small piece
  5. Coconut Oil – 1 + 1 tbsp
  6. Diced Shallots – 2
  7. Curry Leaves – a sprig
  8. Dried Red Chillies – 3 or 4
  9. Water – as needed
  10. Salt – to taste

Preparation Method

  1. Peel the apple and dice it into small pieces.
  2. Heat 1 tbsp oil in a non stick pan and throw in the diced apples, ginger and green chillies. Allow it to cook for 7-8 minutes so that it softens. Stir occasionally so that the apples don’t stick to the pan. Once cooked, remove from heat and allow it to cool.
  3. Once cooled, grind apple, coconut, ginger and green chillies along with 1/4 cup water to form a paste.
  4. Heat another tablespoon of coconut oil in the same pan. Splutter 1/4 tsp mustard seeds.
  5. Add the diced shallots, curry leaves and dried red chillies. Saute until the shallots begin to lightly brown.
  6. Pour the apple-coconut paste to the pan. Clean the mixie/blender bowl with a few tablespoons of water and pour it to the pan.
  7. Add salt to taste. Stir gently and simmer for a few more minutes.

Bok Choy Thoran (Stir Fried Bok Choy with Coconut)

$
0
0

“Bok Choy” also known as “Chinese Cabbage” is a leafy vegetable widely used in Chinese Cuisine. The Asian Market near us usually carries many different varieties of this leafy green like Chinese Bok Choy, Baby Bok Choi, Korean Pak Choi and so on. On my last trip to the Asian market, I was really confused with all the different varieties of this vegetable.

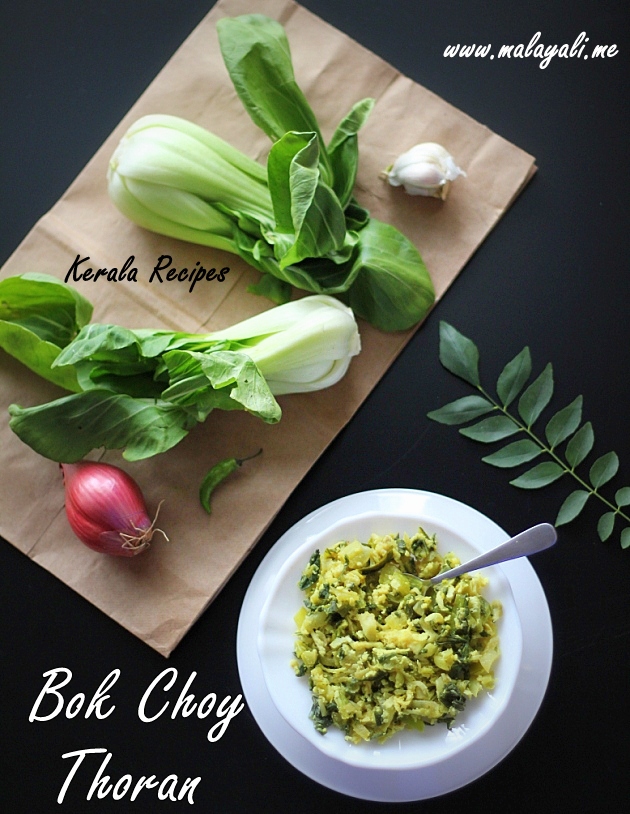
Chinese Cabbage (Bok Choy) Thoran

Bok Choy Thoran


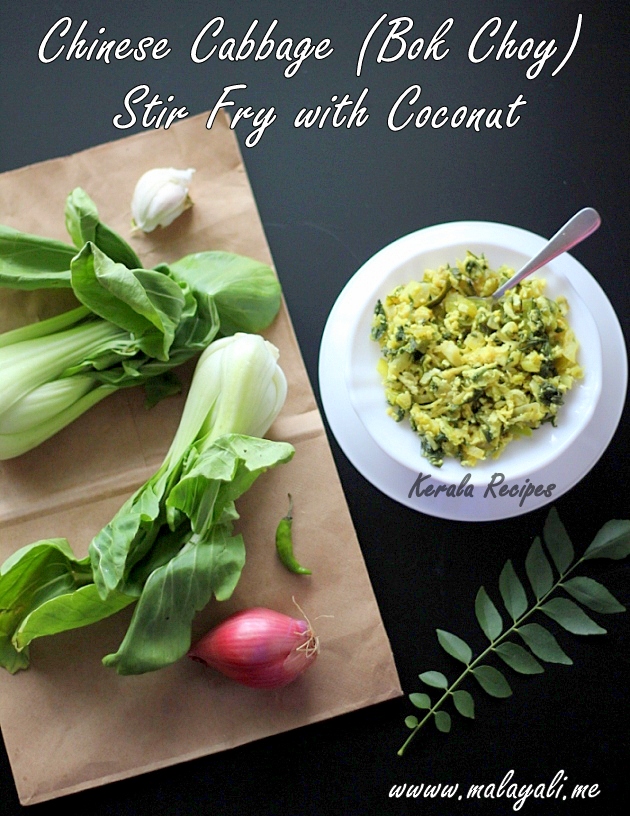
I have made Baby Bok Choy Salad once and liked it. I wanted to try an Indian recipe with Bok Choy and so I came home with Chinese Bok Choy, the one pictured above. I prepared a Thoran with these greens and it tasted similar to cabbage but with a stronger or slightly bitter taste. Most Asian recipes for Bok Choy call for a quick stir fry in garlic or ginger flavored oil. However, I cooked Bok Choy for a longer time so that the stems softened and it tasted less bitter.

Bok Choy (Chinese Cabbage) Stir Fry with Coconut

Bok Choy (Chinese Cabbage) Stir Fry with Coconut


Ingredients

  1. Chinese Bok Choy – 4 clusters
  2. Sliced Shallots (Kunjulli/Pearl Onions) – 1/2 cup
  3. Grated Coconut  – 3/4 cup
  4. Crushed/Finely Chopped Garlic – 3 or 4 cloves
  5. Slit Indian Green Chillies – 3 or 4
  6. Turmeric – 1/4 tsp
  7. Salt – to taste
  8. Coconut Oil – 1.5 tbsp
  9. Mustard Seeds – 1/2 tsp
  10. Curry Leaves – A sprig

Preparation Method

  1. Wash the bok choy clusters thoroughly. Trim the base of each cluster and chop the leaves and stem into small pieces.
  2. Mix together coconut, turmeric powder, shallots, garlic and green chillies using hands or you can coarsely grind everything in a mixie.
  3. Heat 1.5 tbsp coconut oil in a non stick pan and splutter mustard seeds. Add curry leaves and saute for a minute.
  4. Add the coconut mixture and saute for 2 minutes.
  5. Next add the chopped bok choy to the pan and stir fry for a minute. Add more salt if needed.
  6. Cover the pan and cook on medium-low heat for 5-6 minutes, stirring occasionally. The vegetable will begin letting out water.
  7. Remove the lid and stir fry for another 4-5 minutes on medium-high heat so that the water evaporates. Once cooked, the stems should be tender. Serve with rice.

Note

  • If you prefer a crunchy texture, do not cook the Bok Choy for more than 5 minutes.

Besan Carrot Dosa (Chickpea Flour Crepes)

$
0
0

Chickpea or Garbanzo Bean Flour has always intrigued me. I always thought that this beloved Besan (Kadala Maavu) had only one purpose – for making crunchy deep-fried Pakodas/Pakoras. However after tasting Besan Dhoklas a few years back, I decided it was time to experiment with chickpea flours and so began my adventure. These days, I make savory Breakfast Dosas or Crepes with this gluten-free lentil flour.

Besan Carrot Dosa

Besan Carrot Dosa

I love the month of May. It is special in so many ways. A beautiful month dedicated to the Blessed Virgin Mary. Today is also the Feast of St. Joseph the Worker. It is a public holiday in some countries. I am thinking of making lots of good food to celebrate the month of May. I am hoping that I can think ahead and plan good and healthy recipes.

Ok coming to the recipe for Besan/Chickpea Flour & Carrot Dosa. The recipe is similar to that of Besan Broccoli Dosa

but without eggs.You can add grated vegetables of your choice to the batter. I used Carrots. You can make these as thin as crepes or slightly thick like Dosa/Dosha or Pancakes. It goes well with Coconut-based Chutneys. We had it with this wonderful Apple Chutney. Raitha is also a good choice.
Chickpea Flour & Carrot Crepes

Chickpea Flour & Carrot Crepes

Ingredients

  1. Besan (Chickpea/Besan Flour) – 1 1/4 cup
  2. Water – 3/4 cup
  3. Peeled & Grated Carrot – 1 large
  4. Finely diced Shallots – 2 small
  5. Finely minced Curry Leaves – a few
  6. Finely minced Cilantro (Malliyella) – 1 few
  7. Crushed Cumin (Jeera) – 1/2 tsp
  8. Turmeric Powder – 1/4 tsp
  9. Red Chilly Powder – 1/4 tsp (Alternatively, use finely minced green chillies)
  10. Asafoetida (Kaayam) – 2 pinches
  11. Salt – to taste
  12. Oil/Ghee – for brushing

Preparation Method

  1. Peel the carrots and grate it, or pulse it in a food processor or mixie until it gets minced.
  2. Combine the chickpea flour, minced carrots, shallots, curry leaves, cilantro, red chilly powder, cumin, asafoetida and salt in a bowl.
  3. Slowly add 1/2 to 3/4 cup of water to the bowl and whisk everything to form a batter without lumps. It should have the consistency similar to Dosa batter. If you need to make thinner crepes, add more water.
  4. Heat a nonstick pan or griddle and brush some oil or ghee on the surface. Pour a ladle full of batter onto the pan and spread to form a pancake of 1/4 ” thickness.
  5. Cook for around 2-3 minutes on medium heat or until set. Flip and cook the other side for two more minutes. Brush more ghee on the dosa if needed.
  6. Serve these piping hot with a Chutney or Raitha. They don’t taste all that great if cold.


Brinjal Kara Kuzhambu

$
0
0

Hubby had been expressing his desire to have a Tamil Style Meal from a long time. He wanted a Saravana Bhavan type Vegetarian Meal with Kara Kuzhambu, Vatha Kuzhambu and so on. Since, I am unfamiliar with Tamil Cuisine, I decided to search for some recipes to satisfy hubby’s palate. I found many recipes for Kara Kuzhambu and decided to give it a try. The only vegetable I had with me was Brinjal/Eggplant and so I made Brinjal Kara Kuzhambu also known as Kathrikkai Kara Kuzhambu in Tamil.

Eggplant/Brinjal Kara Kuzhambu

Brinjal Kara Kuzhambu


Remember, how I have said I don’t really like Eggplants

and that I often don’t know what to cook with it. Well, I must say I have changed my opinion about Brinjal (Vazhuthananga). I simply love this hot & tangy Brinjal Curry/Kuzhambu. It goes so well with Rice and this is probably the only way I am going to be making curries with Eggplant – well at least for a while until I get bored of it! One thing that I have learned after all these years is that Eggplants & Tomatoes make a good pair. Throw in some garlic and it becomes even more better.
South Indian Brinjal Tomato Curry  (Kara Kuzhambu)

South Indian Brinjal Tomato Curry (Kara Kuzhambu)

Hubby liked this Kara Kuzhambu a lot specially since it had lots of Chaaru (gravy)! And when he is happy, I am a happy woman!

Ingredients

  1. Chinese Purple Brinjal/Eggplant – 1 large
  2. Sliced Onions – 1 medium
  3. Diced Tomatoes – 2 ripe ones
  4. Minced Garlic – 4 cloves
  5. Dry Red Chillies – 2 or 3
  6. Curry Leaves – a sprig
  7. Oil – 1 tbsp
  8. Mustard Seeds – 1/4 tsp
  9. Cumin (Jeera) Seeds – 1/4 tsp
  10. Fenugreek (Uluva) Seeds – 1/4 tsp
  11. Urad Dal (Uzhunnu Parippu) – 1 tsp
  12. Asafoetida Powder (Kaayam) – a pinch
  13. Sambar Powder – 1.5 tbsp
  14. Red Chilly Powder – 1/2 tsp
  15. Tamarind Paste – 2 tsp (Alternatively, you can tamarind extract. See Notes.)
  16. Powdered Jaggery – 1 tsp (optional)
  17. Rice flour – 2 tsp
  18. Water – as needed
  19. Salt – to taste

Preparation Method

  1. Heat oil in a pan and splutter mustard seeds.
  2. Reduce heat and add fenugreek seeds, uzhunnu parippu and jeera seeds. Quickly stir fry for a minute.
  3. Throw in the onions, red chillies and curry leaves. Saute until the onions are translucent.
  4. Add the chopped tomatoes and garlic. Saute until the tomatoes are mashed and cooked.
  5. Reduce heat and add sambar powder, red chilly powder and asafoetida. Stir fry for a minute.
  6. Add the diced brinjal to the pan and saute for 2-3 minutes.
  7. Add 2 cups of water to the pan along with salt to taste.
  8. Bring everything to a boil and then simmer for 5 minutes. Add tamarind paste to the pan and mix everything.
  9. Do a taste test and add 1 tsp of jaggery powder to balance the flavors. (optional)
  10. Dissolve rice flour in 1/4 cup water and add it to the pan. Simmer for 5-7 minutes so that the gravy thickens.

Note

  1. You can also use Indian Eggplant or any other variety for this recipe.
  2. I have also tried this recipe with Canned “Fire roasted Tomatoes & Garlic” and it tasted equally good.
  3. If using tamarind extract, soak a small lemon sized piece of it in little water. Using your hands, squeeze the juice from the extract and use the tamarind water. Discard the solids.

Roasted Carrots

$
0
0

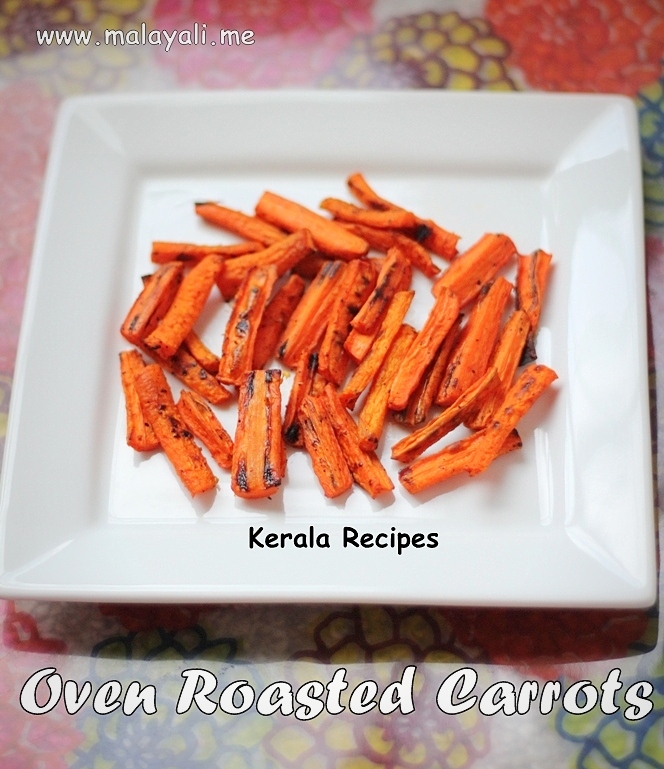
When you are trying to eat healthy, you are always on the lookout for healthy snacks. These oven roasted carrot sticks are all that I can ask for when those snack cravings hit me. They are super easy to make and taste out of this world. Roasting brings out the natural sweetness of vegetables. It makes everything taste so flavorful.

Oven Roasted Carrots

Oven Roasted Carrots

Who needs French Fries or other deep fried snacks when you have these Healthy Carrot Sticks.

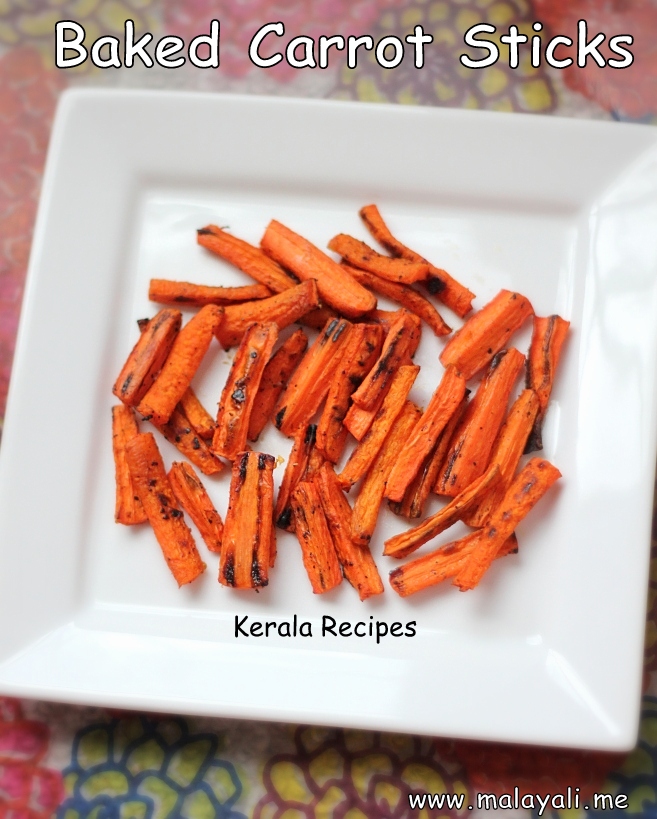
I was in a hurry to take a picture so that I could dive right into these yummy carrots. They are irrestible. Yes, I managed to share it with my husband! He thought these were Baked Sweet Potatoes. They kind of taste similar but I like these far better than sweet potatoes.

Healthy Oven Baked Carrots

Oven Baked Carrots

Ingredients

  1. Carrots – 4 big ones
  2. Olive or Coconut Oil – 1.5 tsp
  3. Salt – to taste
  4. Black Pepper Powder – 1/4 tsp

Preparation Method

  1. Peel and wash the carrots. Cut each carrot approximately into 2″ long strips of around 1/2″ thickness. If the strips are thin, they will burn quickly.
  2. Toss the strips in oil, salt and pepper.
  3. Arrange them in a single layer on a baking tray.
  4. Preheat oven to 425 F. Bake the carrots for 18-20 minutes, making sure to toss the tray after 10 minutes to avoid the carrots sticking to the pan.
  5. Serve immediately.

Jackfruit Seeds, Drumsticks and Mango Curry

$
0
0

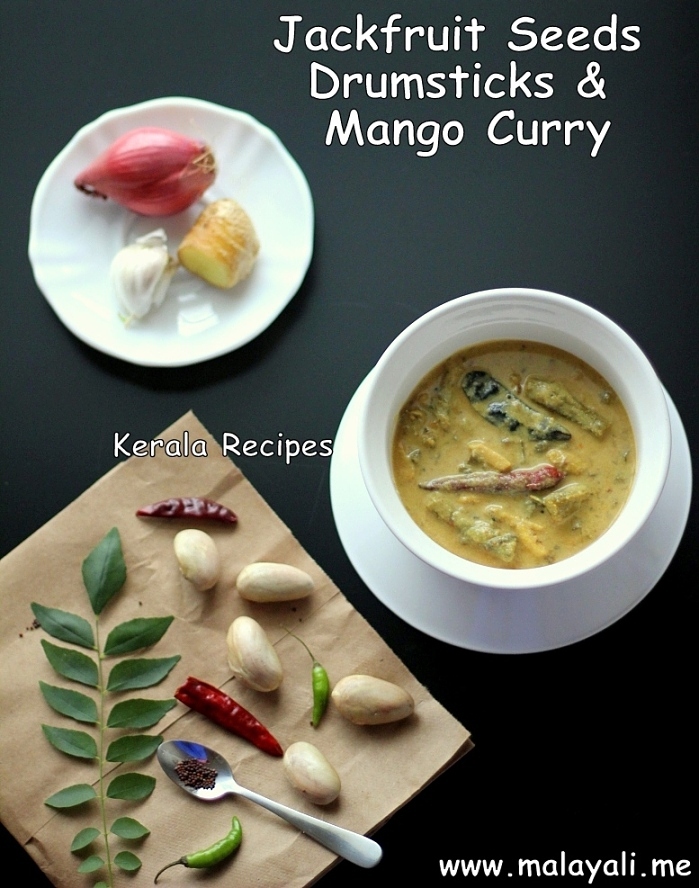
In Kerala, during Jackfruit Season, Jackfruit seeds (Chakkakuru) make their way into many dishes. These seeds are so popular that you can find peeled and frozen jackfruit seeds in many Indian Grocery Stores. In Kerala, Jackfruit Seeds are sundried and stored for use during the rainy season. Drumsticks (Muringakka) and Jackfruit Seeds make a lovely pair along with sour mangoes. Here is the recipe for Chakkakuru Muringakka Maanga Curry. This dish can also be made in the same manner without Drumsticks.

Chakkakuru Muringakka Maanga Curry (Jackfruit Seeds Drumsticks & Mango Curry)

Chakkakuru Muringakka Maanga Curry

It was a rainy day when I took this photo and so it looks dull in the low-lighting but the curry tastes yummy with Rice. Fresh Jackfruit Seeds sometimes have a long cooking time. So it is better to pressure cook the Chakkakuru for 1 or 2 whistles on medium-high heat.

Ingredients

  1. Jackfruit Seeds – 15
  2. Drumsticks – 2 big ones
  3. Raw Mango (Pacha Manga) – 1 medium
  4. Slit Green Chillies – 2
  5. Turmeric Powder – 1/4 tsp
  6. Salt – to taste
  7. Water – as needed

For Grinding

  1. Coconut – 1 cup
  2. Cumin (Jeera) – 1/4 tsp
  3. Turmeric Powder – 1/4 tsp
  4. Green Chillies – 2 (Alter according to your spice tolerance)
  5. Garlic – 1 small clove
  6. Water – 1/2 cup

For Seasoning

  1. Coconut Oil – 1 tbsp
  2. Mustard seeds – 1/4 tsp
  3. Finely Sliced Shallots (Kunjulli) – 4
  4. Dry Red Chillies – 3 or 4
  5. Curry Leaves – A sprig

Preparation Method

  1. Peel the outer white skin from the jackfruit seeds. Then, scrape off the brown skin as much you can. You may retain a bit of the brown skin since it’s high in fibre.
  2. Slice each jackfruit seed lengthwise into 3-4 pieces. Wash and drain the seeds.
  3. Roughly scrape the drumsticks and cut each drumstick into 2″ long pieces.
  4. Peel the mango and cut it into medium pieces.
  5. Cover and cook the jackfruit seeds in around 1 cup water along with the slit green chillies, 1/4 tsp turmeric powder and salt to taste. Cook on medium-low heat until the seeds are tender. I had to cook the seeds for 25-30 minutes.
  6. When the seeds are almost cooked, add the mango pieces and drumsticks. Continue cooking till everything becomes soft. You can mash a few of the jackfruit seeds with the back of a wooden spoon.
  7. Meanwhile, grind coconut and other ingredients into a smooth paste. Add the ground paste to the curry along with half cup of water. Add more water if you need more gravy.
  8. Simmer the curry for a few minutes, stirring occasionally and remove from heat. Do not boil.
  9. Heat 1 tbsp oil in another pan. Throw in the mustard seeds, shallots, red chillies and curry leaves. Saute until the shallots brown. Pour the seasoning to the curry.

Note

  • You can reduce the number of mango pieces depending on the sourness of the mango used.
  • Adjust the consistency of the curry by increasing or decreasing the water.

Vattayappam (Steamed Rice Cake)

$
0
0

“Vattayappam” literally means “Round Cake/Bread”. It is a soft and fluffy ‘steamed rice cake’ often made for Tea. It is the only cake I think my maternal Ammachi (Grandma) used to make. Of course, there weren’t any ovens in my Grandma’s home. So, I guess steaming was the only way to come out with a cake. Now a days, Vatteyappam can be found in almost all bakeries. However, I like the homemade version better as it doesn’t have the overpowering taste of Yeast.

Vattayappam (Sweetened Rice Cakes)

Vattayappam (Sweetened Rice Cakes)

The main ingredients for Vattayappam are same as that of other Appams – Rice and Coconut. In fact, I often use leftover Palappam batter for making Vatteyappams. You just need to add a few more ingredients to the batter and it is ready for steaming. My mother uses Jaggery (Sharkara) while making Vattayappam but I use sugar. The taste and texture differs if you use Jaggery instead of Sugar. I love the version with sugar since I feel it’s fluffier than the other one. There is also a more simpler way to make Vatteyappam using Rice Flour. However, this one tastes better.

Kerala Steamed Rice Cakes

Kerala Steamed Rice Cakes

Ingredients

For Appam Batter

  1. Raw Rice (Pachari) – 2 cups (Use any short or long grain rice)
  2. Cooked Rice – 3/4 cup approx
  3. Yeast – 1.5 to 2 tsp
  4. Sugar – 1 tbsp + 3-4 tbsp or as needed
  5. Ice cubes – as needed
  6. Water – as needed

Remaining Ingredients for Vatteyappam

  1. Appam Batter – 2 to 2.5 cups
  2. Grated Coconut – 1/2 cup
  3. Sugar – 2-3 tbsp
  4. Crushed/Powdered Cinnamom (Elakka) – 4 pods
  5. Raisins – 10 to 15
  6. Salt – to taste
  7. Oil – for greasing
  8. Water – a few teaspoons

Preparation Method

  1. Soak the rice for atleast 6 hours or leave it overnight. Wash and drain the rice and keep aside.
  2. Dissolve the yeast and 1 tbsp sugar in 1/2 cup of slightly warm water. Keep it aside for ten minutes until it foams.
  3. Next, you need to grind the rice in several batches. Grind around two handfuls of raw rice along with a few tablespoons of cooked rice and very little water. I add 2-3 ice cubes while grinding each batch to prevent the mixie from overheating. Grind until you get a smooth batter.
  4. Transfer the batter to large bowl. Continue doing this with the remaining rice.
  5. While grinding the last batch, add the yeast solution to the mixie so that it gets incorporated well with the batter.
  6. Leave the batter in a warm place for around 6 hours. I usually leave it overnight. Ensure that the bowl is large enough to prevent the batter from overflowing after fermentation.
  7. The batter would have risen after fermentation and will look foamy. Stir the batter and keep aside. This batter can be used for making both Palappam and Vatteyappam.
  8. Transfer 2 to 2.5 cups of this batter to another bowl for making Vatteyappam. You can use the remaining batter for Palappams or refrigerate it for later use.
  9. Grind the grated coconut along with a few teaspoons of water to form a smooth mixture. Add it to the batter.
  10. Add sugar as per desired sweetness (2-3 tbsp), powdered cardamom and salt to taste. Mix everything together. The batter should be somewhat thick and not watery. Keep this batter aside for 20-30 minutes so that it becomes foamy (optional).
  11. Grease a round steamer plate and pour the batter into it. Steam it for 10 minutes. Open the lid and place the raisins on top. (Be careful not to burn your hands!)
  12. Keep it covered and allow it to cook for 5 more minutes or until done. Insert a toothpick/fork to check if it comes out clean.
  13. Once the vatayappam is cooked, allow it to cool thoroughly and then transfer it to a plate. Cut it into desired shapes and serve.

Note

  • You may need to adjust the amount of cooked rice used for preparing the batter. If you use too much of boiled rice, the appams will become sticky. If the rice used is less, appams won’t be soft. Try using 1/2 to 3/4 cup of cooked rice but not more than that.
  • While grinding the rice, try adding very little water. The unfermented batter should be thick as it will rise and thin out after fermentation.
  • If the batter appears watery after adding the coconut mixture, you can add a few tablespoons of rice flour to get the desired consistency.
  • You can also make these in Idli moulds if you don’t have a steamer.

Roasted Acorn Squash

$
0
0

When I saw these cute little Acorn Squashes at the market, I couldn’t resist. I had no idea how to cook these and yet I bought. I have only used Pumpkin and Summer Squashes in my kitchen and that too for making savory curries. I hadn’t ventured out to the other squash varieties. Acorn Squash also known as Pepper Squash is a Winter Squash and is found abundantly during Fall and Winter. I know! I know! It’s summer but I still found these at the store.

Roasted Acorn Squash

Roasted Acorn Squash

I searched for recipes and found many for Oven Roasted Acorn Squash on Martha Stewart and plenty of other sites. I thought if it’s so popular, it shouldn’t go wrong and decided to try it. Roasted Acorn Squash is a traditional way of making these cuties. The recipe is fairly simple with few ingredients but time consuming! Yes, all easy recipes are not quick! I didn’t know what to expect from this squash but I was flattered after the first bite. Such a delicate and sweet flavor! I loved it and finished it in one sitting. Glad that I took pics before tasting the first bite.

Maple Glazed Acorn Squash

Maple Glazed Acorn Squash

This is such a versatile recipe. You could make it savory or sweet. You can serve it as a snack or even for dessert. These look so pretty on the table! The roasted flesh can be scooped out and you could serve it with Icecream and Pralines. Yum!

Ingredients

  1. Acorn Squash – 1
  2. Salt – to taste
  3. Maple Syrup – 4 tbsp
  4. Butter (softened) – as needed for brushing

Preparation Method

  1. Preheat oven to 400 degree F.
  2. Cut the acorn squash into two halves. This is the tricky part. You need a really sharp knife to cut through the thick skin. If you see the pics, you will notice how my halves are not the same size but doesn’t matter!
  3. Scoop out the seeds and fibrous stuff with a spoon.
  4. Using your knife, stash the flesh couple of times.
  5. Brush the insides of the squash with butter. Sprinkle salt to taste.
  6. Bake it with the cut sides down for 20-30 minutes. Remove from oven. You will notice that the outer skin has softened.
  7. Turn and then drizzle 2 tbsp maple syrup on the insides of each half.
  8. Continue baking for another 20 minutes or until the top appears to be lightly brown. The maple syrup will form a nice glaze.
  9. Serve warm with more salt and maple syrup if needed.

Note

  • When buying acorn squash look for the dark green variety which is beginning to turn orange here and there.
  • You can easily scoop out the flesh of the roasted squash with a spoon.
  • Try serving it with icecream and pralines or roasted nuts for the ultimate dessert.


Lemon Flavored Pulav

$
0
0

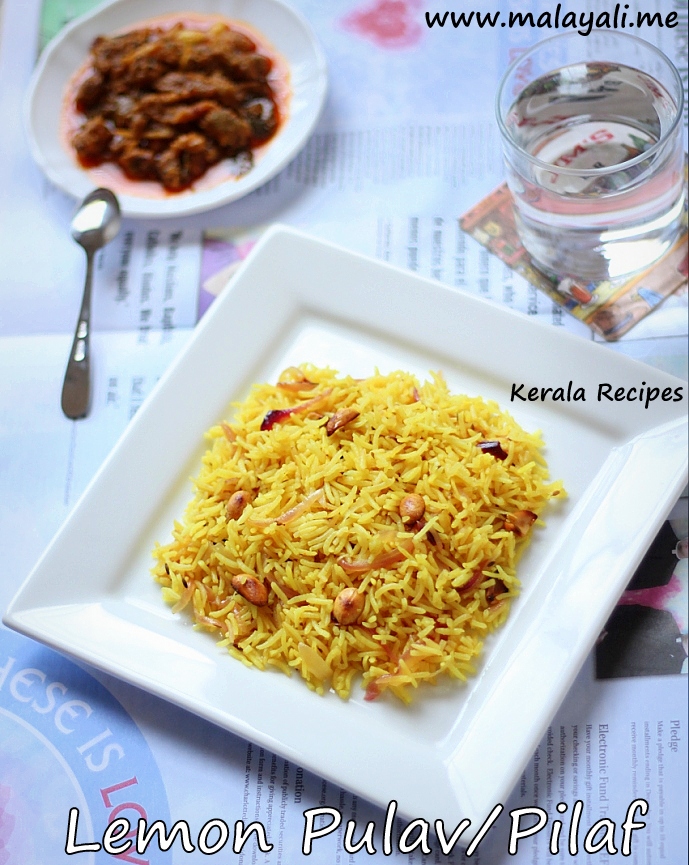
I was running out of time to make lunch before hubby came home. I looked into my pantry and refrigerator couple of times trying to come up with something. That’s when I saw a lemon and immediately had an idea. I decided to make a Lemon Flavored Pulav with Basmati Rice similar to South Indian Lemon Rice. Since Basmathi Rice cooks in 10-12 minutes, I ended up with a flavorful meal in less than thirty minutes.

Lemon Flavored Basmati Rice

Lemon Flavored Basmati Rice

The roasted peanuts give a nice crunch to this Pulav. The rice has a delicate flavor of lemon and isn’t spicy. Kids will like this mild tasting Lemon Rice. We had this Lemon Pilaf with homemade Fish Pickle. You can also serve it with any spicy meat based curries.

Indian Lemon Pulav

Indian Lemon Pulav

Ingredients

  1. Basmati Rice or any Long Grain Rice – 1 cup
  2. Lemon – 1 medium
  3. Thinly Sliced Red Onions – 1 small
  4. Cumin Seeds (Jeerakam) – 1/4 tsp
  5. Peanuts – a small handful
  6. Turmeric Powder – 1/4 tsp
  7. Ghee – 1 tsp
  8. Oil – 2 tsp
  9. Sugar – 1.5 tsp
  10. Salt – to taste
  11. Water – 1 cups

Preparation Method

  1. Soak the Basmati rice for ten minutes. Wash thoroughly and drain it.
  2. Squeeze juice from one lemon. Add it to 2 cups of water. Filter the liquid for seeds and keep aside.
  3. Heat ghee and oil in a pan or kadai. Throw in the peanuts and stir fry until it begins to lightly brown. Add the cumin seeds and give a quick stir.
  4. Next, add the sliced onions and saute until translucent.
  5. Add the drained Basmati Rice to the pan and lightly fry for 2-3 minutes. Reduce heat, add turmeric powder and saute for a minute.
  6. Pour the lemon water to the pan. Add 1.5 tsp sugar and salt to taste. Increase heat to medium-high and bring everything to a boil.
  7. Cover the pan and cook for 4-5 minutes.
  8. Reduce heat to low and allow the rice to cook for another 7-10 minutes until all water has been absorbed.
  9. Open the pan and fluff gently with a fork to separate the rice. Serve warm.


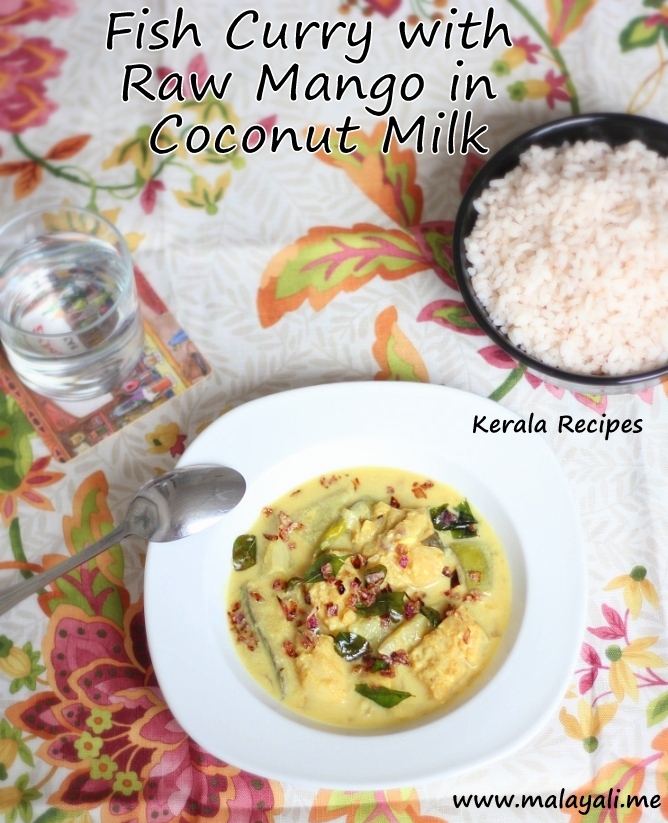
Fish Curry with Raw Mango in Coconut Milk

$
0
0

A few weeks back when we visited one of our friend’s house, we got the chance to try her Mom’s wonderful Kerala Style Fish Curry with Raw Mangoes. I was immediately hooked on to the taste and I asked aunty for the recipe. She is from Ernakulam and this is one of the ways in which Fish Curry is made in Ernakulam-Angamaly areas. This recipe was new to me as I mostly make Kerala style Fish Curry with Kudampuli or Tomatoes. We had this Raw Mango Fish Curry with Rice as well as aunty’s special Manja Kappa (Yellow Tapioca).

Fish Curry with Raw Mangoes

Fish Curry with Raw Mangoes

This curry is really mild yet flavorful. It isn’t overpowered with spices unlike the other Red Fish Curry. The gravy goes so well with rice as well as Tapioca (Kappa) and as you bite into the pieces of mango, you will be thankful for such good recipes from Kerala. My mother-in-law makes a similar Fish Curry (Meen Mangayittu Vechathu) but instead of Coconut Milk, ground coconut paste is used. I will have to try out that recipe when I get a chance.

Mangayitta Meen Curry

Mangayitta Meen Curry

Ingredients

  1. Fish – 1 kg (2.2 lbs) approx
  2. Raw Mango (Pacha Manga) – 1 medium
  3. Sliced Shallots – 1/2 cup (Alternatively, you can use Red Onions)
  4. Curry Leaves – 1 big sprig
  5. Slit Green Chillies – 5 (Alter according to your spice tolerance)
  6. Crushed/Minced Garlic- 2 big cloves
  7. Crushed/Minced Ginger – 1 tbsp (1″ long piece approx)
  8. Turmeric Powder – 1/2 tsp
  9. Red Chilly Powder – 1 tsp
  10. Thin Coconut Milk – 2 cups
  11. Thick Coconut Milk – 1/2 cup
  12. Salt – to taste
  13. Coconut Oil – 1 tbsp
  14. Lemon Juice – 1 tbsp

For Seasoning

  1. Thinly Sliced Shallots – 2 or 3
  2. Curry Leaves – a sprig
  3. Coconut Oil – 2 tsp

Preparation Method

  1. Clean the fish and cut it into medium sized pieces. Soak it in water along with 1 tbsp lemon juice for a few minutes. Drain and keep aside.
  2. Wash and peel the mango. Dice it into medium sized pieces (1″ X 1″ approximately).
  3. Heat 1 tbsp oil in a manchatti (clay pot) or a wide pan. Throw in the sliced shallots and curry leaves. Saute for a few minutes until the shallots become translucent.
  4. Add the green chillies, ginger and garlic. Saute until the shallots begin to brown.
  5. Reduce heat and add turmeric and red chilly powders. Saute for a minute.
  6. Add the thin coconut milk to the pan along with salt to taste. Bring it to a slow boil.
  7. When it begins to boil, add the mango pieces. Let it cook for 5-7 minutes.
  8. Add the fish to the gravy. Make sure that the fish is covered in gravy. Cover and cook on medium-heat for 10-12 minutes, swirling the pan occasionally.
  9. Reduce heat and add thick coconut milk. Swirl the pan and remove from heat.
  10. Heat 2 tsp oil in another pan. Saute sliced shallots and curry leaves until the shallots are golden brown.
  11. Pour this seasoning over the fish curry. Keep covered for at least 4-5 hours so that the fish absorbs the flavors.

Note

  • You can use canned Coconut Milk or Coconut Milk Powder for convenience instead of freshly squeezed Coconut Milk.
  • If you cannot get Raw green mangoes, you can use Frozen Cut Mangoes available in Indian grocery stores. I used a combination of both Fresh and Frozen Green Mango.
  • I used Pacific Cod Fish fillets in this recipe. It is better to use thick, fleshy fish for this recipe.


Mini Zucchini Omelettes

$
0
0

Breakfast happens to be the most difficult meal for me! I have a difficult time coming to terms with what I will be preparing for Breakfast. I don’t like the Boxed Cereals and Oatmeal. I also don’t want to go high on carbs with traditional Kerala breakfast items like Puttu and Appam. I consider those to be occasional treats. I have been trying to incorporate more veggies and protein into Breakfast so that we stay full for a couple of hours.

Mini Zucchini Omelettes

Mini Zucchini Omelettes

I had seen plenty of recipes for Zucchini Fritters or Latkes and wanted to try it for breakfast. Latkes are fried pancakes usually made with potato, flour and eggs. Zucchini can be made into Latkes using binding agents like flour and eggs. I didn’t want to use flour and these ended up being more like Mini Zucchini Omelettes. I like that I can make these in ten minutes and are not high in carbs. If you are looking for a healthy way to start your day, try these mini omelets. The above picture was taking on a cloudy day and hence, it looks so dull! This is perfect for those on a Paleo or Low Carb diet.

I need to try making these into crispy Fritters using Flour. I am sure it would taste awesome like Hashbrowns.

Serves: 2

Yield: 4 Mini Omelettes

Ingredients

  1. Zucchini – 1 large
  2. Egg – 1
  3. Dessicated Coconut – 2 tbsp
  4. Salt – to taste
  5. Pepper – 1/8 tsp
  6. Red Chilly Powder – 1/8 tsp
  7. Butter/Cooking Spray – to coat the pan

Preparation Method

  1. Wash the zucchini and grate it. You don’t have to peel the zucchini.
  2. Beat egg with salt and pepper. Add it to the zucchini.
  3. Throw in the dessicated coconut and red chilly powder.
  4. Mix everything with a spoon. The mixture will be slightly watery.
  5. Heat a tava, skillet or griddle. Melt some butter or you can use cooking spray.
  6. Drop a big spoonful of the zucchini mixture onto the pan. Flatten it out with the back of the spoon as much as you can.
  7. Allow it to cook for 2-3 minutes on medium heat. Flip and cook the other side for 2 more minutes.
  8. Remove the omelette from the skillet and repeat with the remaining batter.
  9. Serve hot with ketchup or sour cream.

Note

  • Zucchini tends to let out water. You can try squeezing out water from the grated zucchini before mixing it with the other ingredients. I have prepared these in both ways and didn’t notice much of a difference.
  • It’s good to keep these omelets small in size to prevent it form breaking while flipping.
  • If you don’t have zucchini, try using carrots or sweet potatoes.

Lemony Pasta with Broccoli and Ham

$
0
0

For a quick weeknight dinner, Pasta often comes to my rescue. I try to keep it simple with very few spices and condiments. Pasta dressed up in heavy sauce is reserved for special occasions! ;) Here is a simple but yummy Lemon Flavored Pasta with Broccoli and Ham.

Lemony Pasta with Broccoli and Ham

Lemony Pasta with Broccoli and Ham

It is dairy free as I haven’t used Cheese. So enjoy it without guilt! If you are on a gluten-free diet, you can use Brown Rice Pasta or Quinoa Pasta instead of wheat pasta. The whole meal can be prepared in less than thirty minutes. Don’t you worry about slogging in the kitchen! This is how my pictures look when I use indoor lighting. I need to change the White Balance. Hopefully next time!

Easy Lemon Flavored Pasta

Easy Lemon Flavored Pasta

Serves: 2

Ingredients

  1. Pasta – 12 oz packet ( I used Tri Colored Rotini)
  2. Broccoli Florets – separated from 1 small broccoli
  3. Diced Slow Cooked Ham – 1/4 cup
  4. Lemon Juice – 2 tbsp approx (Use juice from 1 big lemon)
  5. Red Chilly Flakes – 1/4 tsp
  6. Black Pepper powder – 1/8 tsp
  7. Melted Butter/Olive Oil – 1.5 tbsp
  8. Salt – to taste
  9. Pasta Water – 2 tbsp

Preparation Method

  1. Roughly chop the broccoli florets into smaller pieces.
  2. Bring salted water to a boil and cook the pasta according to the instructions on the packet.
  3. When the pasta is around half-cooked, throw in the broccoli florets. Keep stirring occasionally.
  4. Drain everything into a colander when the pasta is al dente (cooked but firm) and reserve the water.
  5. Transfer 4 cups of the cooked pasta and Broccoli into a bowl. Add the diced ham.
  6. In another bowl, whisk lemon juice, butter, salt, pepper and red chilly flakes along with 2 tbsp of the reserved pasta liquid.
  7. Pour it over the pasta. Toss everything and serve immediately.

Note

  • You can double the recipe for more servings.
  • Refrigerate the remaining pasta and broccoli. You can use it in other recipes.
  • You can also refrigerate the reserved Pasta Water for a few days. It can be used for thickening soups and stews.
  • If you don’t eat ham, you can substitute it with boiled and cubed chicken breasts.


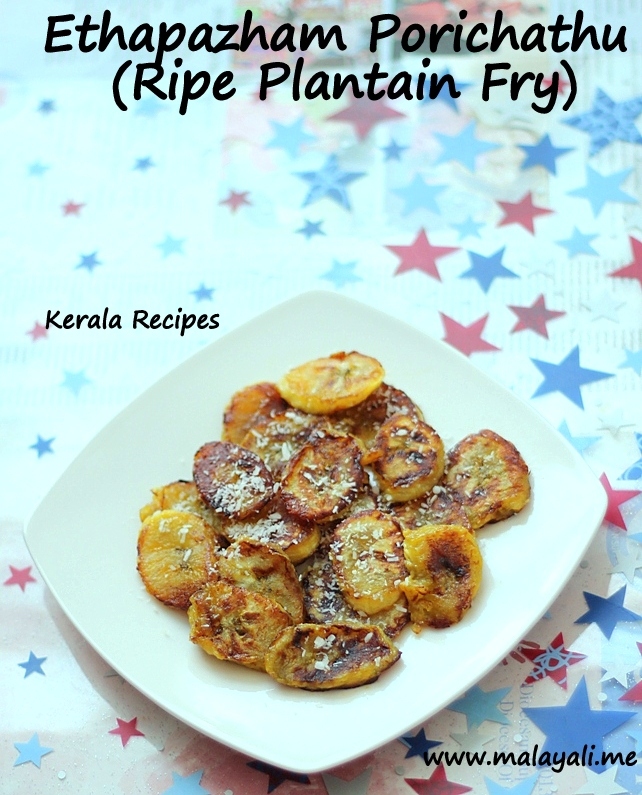
Pan Fried Plantain (Ethapazham Porichathu)

$
0
0

The easiest and yummiest snack I have ever eaten is Ethapazham Porichathu (Ripe Plantain Fry). Growing up in Kerala, Plantains were something we ate almost daily. I often took Plantains for granted and only began to miss it when I moved outside Kerala. I cannot even call this a recipe but the simple step of frying plantains caramelizes it and it tastes so good. I would urge you to try this recipe if you have ripe plantains. This tastes best when you use plantains that are really ripe, the skin should be almost black with very little yellow.

Ripe Plantain Fry (Ethapazham Porichathu)

Ripe Plantain Fry (Ethapazham Porichathu)

Serves : 2

Ingredients

  1. EthaPazham (Nenthrapazham)/ Ripe Plantains – 2
  2. Coconut Oil/Ghee – 1 to 2 tsp
  3. Dessicated Coconut – 1 tsp (optional)

Preparation Method

  1. Peel the plantain and dice it into 1/4″ to 1/2 ” thick pieces.
  2. Heat oil/ghee in a non stick frying pan or skillet. Arrange the diced plantain pieces in a single layer in the pan.
  3. Fry each side for 2-3 minutes so that that edges are browned.
  4. Remove and arrange it on a plate. Sprinkle dessicated coconut on top. Serve immediately.

Note

  • I prefer the taste of coconut oil to ghee though traditionally, this snack is prepared in ghee.
  • If the plantain pieces are thin, they may become mushy. A few of my pieces were thin and became slightly mushy while flipping.

Sweet and Spicy Baked Chicken

$
0
0

A simple dinner like Baked Chicken Drumsticks straight from the oven sprinkled with a squeeze of lime and served with a salad makes me satisfied. I have made Breaded Chicken Drumsticks a few times and liked it. I was searching for good recipes using Chicken Drumsticks and landed on this page.  The recipe looked simple and I decided to give it a try with whatever ingredients I had in my kitchen. I adapted the recipe to make a dry preparation and it came out well.

Oven Baked Chicken Drumsticks/Legs

Oven Baked Chicken Drumsticks/Legs

Hubby liked these Sweet and Spicy Chicken Drumsticks and kept telling how delicious it tasted. It tasted better than Barbeque Chicken or at least at par with it specially with all the brown charred spots!  Next time, I would like to try Baked Tandoori Style Chicken. Sounds so yummy! I am drooling thinking about it.


Sweet & Spicy Baked Chicken

Sweet & Spicy Baked Chicken

Recipe Adapted from: Tasty Kitchen

Serves: 3

Ingredients

  1. Chicken Drumsticks (Skin Removed) – 6 big pieces (1.75 lbs or 3/4 kg approx)
  2. Ketchup – 2 tbsp
  3. Soy Sauce – 1 tbsp
  4. Sweet Mango Chutney/Jam – 2 tbsp (You can use any Fruit Preserve like Apricot Preserve)
  5. Honey – 1 tbsp
  6. Red Chilly/Cayenne Pepper Powder – 1/2 tbsp (Alter according to your Spice Tolerance)
  7. Garlic Powder – 1/2 tsp
  8. Onion Powder – 1/2 tsp
  9. Black Pepper Powder – 1/2 tsp
  10. Lime Juice – 2 tbsp (squeezed from 1 big lime)
  11. Salt – to taste
  12. Lime Wedges – for serving

Preparation Method

  1. Wash and clean the drumsticks. Wipe with a paper towel and make 2-3 deep slits on each drumstick.
  2. Prepare a marinade using the above ingredients. Apply the marinade liberally on the drumsticks. Reserve whatever remaining marinade you have for basting the chicken.
  3. Refrigerate for at least half and hour or up to 4 hours.
  4. Preheat oven to 350 degree Fahrenheit. Line a baking tray with foil (for easier cleaning).
  5. Place the chicken drumsticks on the tray making sure that the pieces don’t touch each other.
  6. Place the tray on the middle rack and bake uncovered for 30 minutes.
  7. Remove tray from oven. Flip each drumstick. Apply more marinade on the chicken using a brush.
  8. Bake for another 20 minutes. Remove from oven. Flip the pieces and apply marinade one more time. Bake for 10 more minutes.
  9. Change the oven setting to Broil.  Broil the Chicken for a minute so that it begins to brown. Keep an eye or else the Chicken will turn to Charcoal.
  10. Allow the chicken to sit for 15 minutes before serving. Sprinkle lime juice just before serving.

Note

  • You can also use 1 tsp each of fresh garlic and onion paste if you don’t have the dried powders.


Plantain Pear Smoothie

$
0
0

When you are not in the mood for an elaborate Breakfast, you can resort to Smoothies. Plantain and Pear sound like an odd combination but that is all that I had in my Kitchen. Here is a quick Plantain Pear Smoothie for all those lazy mornings.

Ripe Plantain Pear Smoothie

Ripe Plantain Pear Smoothie

If you are using ripe Plantain, you actually don’t need sugar or sweetener for this Smoothie. A word of caution – this Smoothie tends to thicken as it sits. By the time my photo session was over, I had to use a spoon to scoop it! :)

Serves: 2

Ingredients

  1. Ripe Plantain – 1 big (It should be really soft and ripe)
  2. Pear – 1 small
  3. Ice Cubes – 8
  4. Water/Milk – 1 cup
  5. Sugar/Honey – 1 tbsp (optional)

Preparation Method

  1. Peel the pear and dice it into a few medium sized pieces. Discard the core.
  2. Peel the plantain and chop it roughly into 3 or 4 pieces.
  3. Blend the plantain and pear along with the sweetener, ice cubes and water. Make sure there are no lumps remaining.
  4. Serve immediately or else it will become thick.


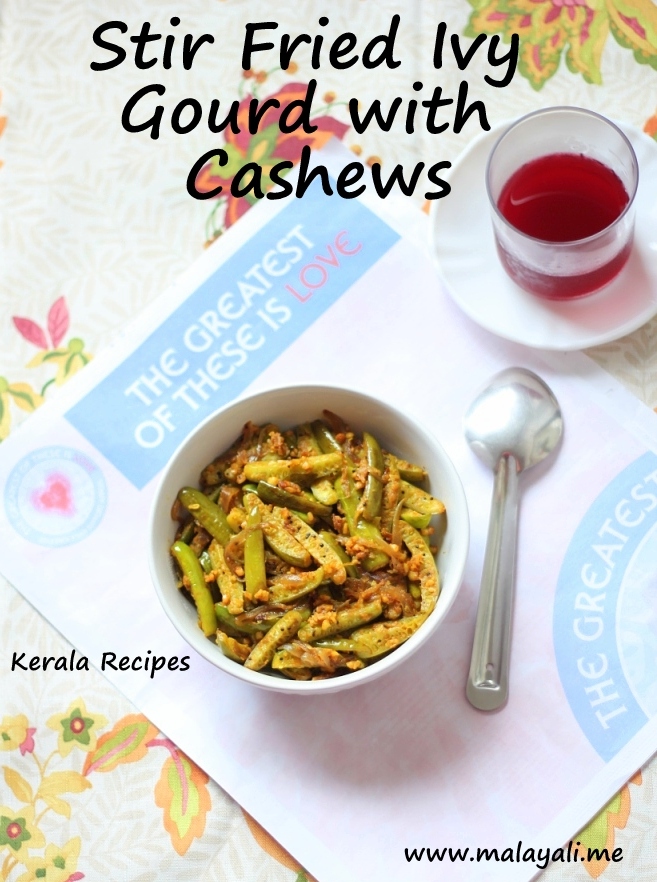
Stir Fried Ivy Gourd with Cashews

$
0
0

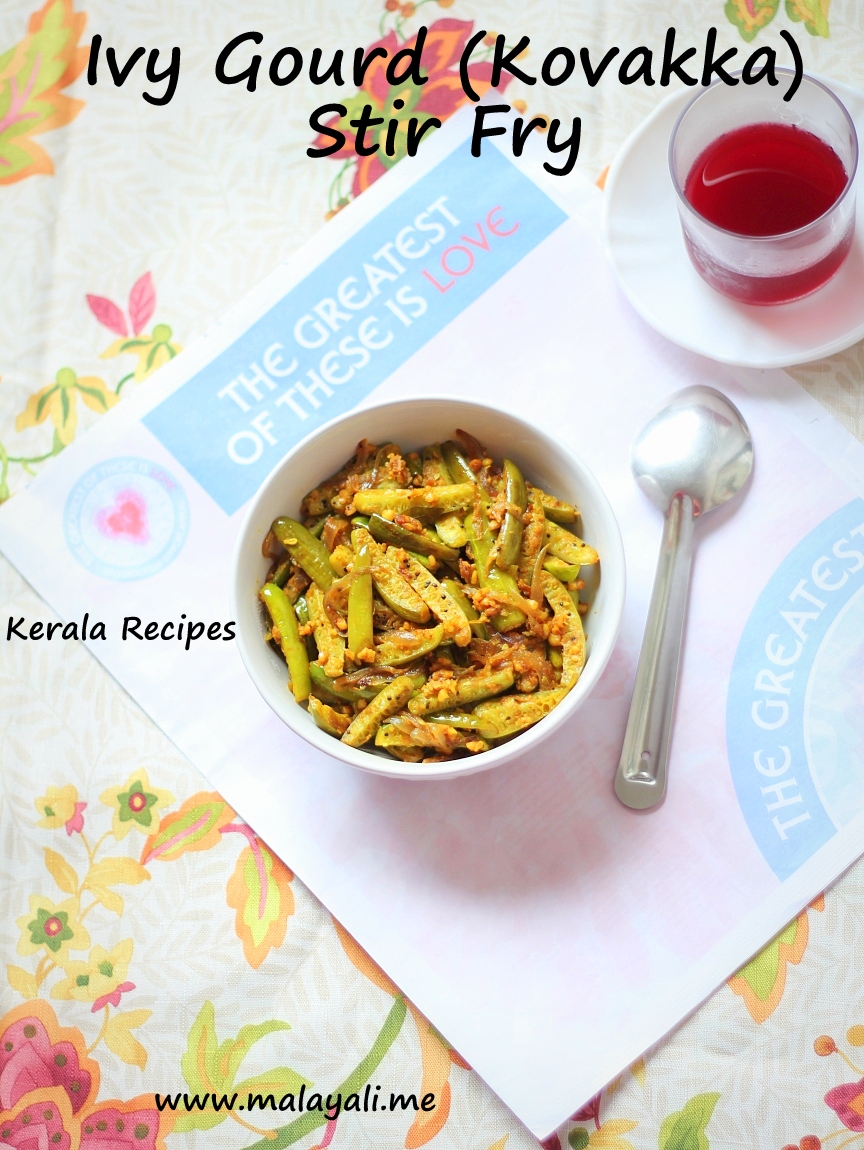
Ivy Gourd (Kovakka/Tindoora) is a vegetable which grows abundantly in tropical places. It is also known as Little Gourd, Gentleman’s Toes and so on. usually make Ivy Gourd Thoran or add it to Sambar. Here is a quick stir fry using Ivy Gourd. I added some coarsely ground cashews for an extra crunch.

Ivy Gourd Stir Fry

Ivy Gourd Stir Fry

I like Kovakka and don’t mind having it every week. I have also seen recipes for Pickled Ivy Gourd similar to Gherkins. I need to try it some day. While making Stir Fries, always use tender Ivy Gourds. The ripe ones have a red pulpy interior and won’t taste good in stir fries.

Stir Fried Ivy Gourd with Cashews

Stir Fried Ivy Gourd with Cashews

This dish can be served with Rice or if you like to eat your veggies, you can have it as such.

Ingredients

  1. Ivy Gourd (Kovakka) – 1/2 kg
  2. Thinly Sliced Onions – 1 medium
  3. Roasted Cashews – a small handful (Alternatively, use roasted Peanuts)
  4. Oil – 1 tbsp
  5. Turmeric Powder – 1/4 tsp
  6. Red Chilly Powder – 1/2 tsp
  7. Sambar Powder – 1 tsp (optional)
  8. Salt – to taste

Preparation Method

  1. Wash the ivy gourd and trim the ends. Slice each Ivy Gourd length wise into 3 or 4 pieces. Marinate it with 1/4 tsp turmeric powder, 1/2 tsp red chilly powder, 1 tsp sambar powder and salt to taste. Keep it aside for ten minutes.
  2. Meanwhile, pulse the cashews coarsely in a mixie or food processor. It shouldn’t become a powder but should be chunky.
  3. Heat 1 tbsp oil in a skillet or pan. Throw in the onions and saute for a few minutes so that it softens.
  4. Add the ivy gourd and saute for 2-3 minutes. Cover and cook for 8-10 minutes, stirring occasionally.
  5. Once the ivy gourd becomes soft, add the powdered cashews. I like a little crunch to my ivy gourd so I don’t overcook it.
  6. Increase heat and stir fry for a few more minutes so that the water evaporates and it gets roasted.

Note

  • Sambar Powder gives a distinct taste to this dish but is optional.
  • If you don’t have Sambar Powder, you can even add a pinch or two of Garam Masala.

Shrimp Fried Rice

$
0
0

Our love for Fried Rice began when we tasted a yummy Shrimp/Prawn Fried Rice from a Chinese Restaurant near our first home. It was addictive to say the least. Probably, it had been loaded with MSG but what attracted us the most was the juicy and tender Shrimp which tasted out of this world. Needless to say, we would buy Shrimp Fried Rice every once in a while.

I had been experimenting with Fried Rice in my kitchen over the last five years but mastering Shrimp Fried Rice was a real challenge. I remember those early days of cooking when my Fried Rice would turn mushy. I tried so many different types of Rice. Then I realized that it’s best to use refrigerated Rice while making Fried Rice. If you use Hot Rice, the chances are high that your Fried Rice will turn mushy.

Chinese Prawns Fried Rice

Chinese Prawns Fried Rice

During those initial days of cooking, I would stir fry Shrimp for 10-15 minutes and it would turn rubbery. I reduced the cooking time to 5 minutes and I still couldn’t replicate the juicy and tender shrimp which we ate at the Chinese Restaurant. I slowly learned that Shrimp needs to be cooked on high heat for a minute or two on each side or else it would become rubbery. I know it sounds unbelievable since Kerala Style Shrimp dishes are often cooked for longer. After all these years, I can say that I have kind of mastered Asian Style Shrimp/Prawn Fried Rice or at least for now until I find a better recipe. ;)

Shrimp Fried Rice

Shrimp Fried Rice

The Photos don’t look all that great but this is one of the best dishes I have made till date. Ask my hubby and he will tell you!

Serves: 4

Ingredients

  1. Basmati rice or any Long Grain Rice – 1.5 cups
  2. Jumbo Shrimp/Prawns (Peeled and Deveined) – 20 to 25 count
  3. Diced White Onions – 1 small
  4. Carrots – 2 medium
  5. Snap Peas – 15 to 18 count
  6. Broccoli Florets – 12 to 15 count
  7. Fresh or Frozen Green Peas – 1/4 cup
  8. Butter – 1 tbsp
  9. Cooking Oil – 1 tbsp
  10. Soy sauce – 1 tbsp (optional)
  11. Chilli Garlic Sauce or any Red Chilly sauce – 1 tsp
  12. Garlic Powder – 1/4 tsp
  13. Onion Powder – 1/4 tsp
  14. Black Pepper Powder – 1/4 tsp
  15. Salt – to taste

For marinating the Shrimp

  1. Red Chilly Powder – 1/2 tsp
  2. Black Pepper Powder – 1/4 tsp
  3. Garlic Powder – 1/4 tsp
  4. Onion Powder – 1/4 tsp
  5. Ginger Powder – a pinch
  6. Salt – to taste

Preparation Method

  1. Wash and clean the shrimp thoroughly. Wipe away excess moisture with a paper towel and marinate it with the above mentioned ingredients. Keep it aside for 15-20 minutes.
  2. Peel the carrots and dice it into 1″ long sticks. Roughly chop the broccoli florets. Trim the edges off the snap peas. If using frozen green peas, defrost it by soaking it in water.
  3. Wash the rice thoroughly and allow it to drain. Heat 1 tbsp butter/oil in a big non-stick pan. Add the drained rice and stir fry gently for 3-4 minutes.
  4. You will need around 2 to 2.5 cups of water to cook 1.5 cups of Basmati Rice (Approximately, 1 Cup less than the double amount of Rice). Add water to the pan along with salt to taste. Increase heat and bring everything to a boil. Cover and cook on medium heat for 4-5 minutes.
  5. Reduce heat to lowest possible setting and let the rice cook for another 5 minutes till all water has been absorbed. Switch off the heat and keep it covered for 5 more minutes.
  6. Open the pan and fluff the rice gently with a fork to separate the grains. Spread the rice on a flat tray and allow it to cool completely. You can also use chilled rice (previously cooked and refrigerated rice). The cold rice really helps in making a good fried rice that is not sticky.
  7. Heat a large non-stick skillet on high heat for a few minutes and then add 1 tbsp oil. The pan should be really hot. Immediately, add the shrimp or else the oil will smoke. Spread it out in a single layer. Allow it to cook for a minute or two and then flip the shrimp. Cook for one more minute and then toss everything for another minute so that the shrimp turns completely opaque. Remove the shrimp from the pan onto a plate and keep aside.
  8. Reduce heat to medium-high and add onions to the same pan. Saute until translucent.
  9. Add all the vegetables and stir fry for 5 minutes so that the veggies are tender yet crisp.
  10. Season the vegetables with salt, pepper powder, onion powder and garlic powder.
  11. Add the cooked rice and shrimp to the pan. If using Soy Sauce, drizzle 1 tbsp to the pan along with the red chilly sauce. Gently toss everything for a few minutes. If it appears dry, splash a few teaspoons of water and stir gently for a few more minutes. Serve immediately.

Note

  • You can use all sorts of vegetables in your Fried Rice. I used Frozen Asian Vegetable Medley which had Baby Corn, Radish and few more vegetables. If using Frozen Veggies, soak it in water for a few minutes to defrost it. Drain it thoroughly before stir frying.
  • If you have can’t tolerate Soy, you can prepare this Fried Rice without Soy Sauce. We like both versions and I personally prefer the one without Soy Sauce.
  • You can also use 1 tsp of fresh Ginger Garlic paste for marinating the shrimp but I prefer the powder for convenience.
  • Feel free to use Spring Onions in this recipe.
  • I haven’t used Egg in this recipe but you can add eggs for an extra flavor. If using eggs, scramble it in the same pan after the shrimp has been cooked. Keep it aside and then mix it with the rice towards the end of cooking.


Viewing all 64 articles
Browse latest View live