Quantcast
Channel: Kerala Recipes
Viewing all 64 articles
Browse latest View live

Crispy Fried Lady’s Finger (Vendakka Varuthathu)

$
0
0

I am back after a mini-break and as I always tell Summer can be busy. I feel bad when I ignore my Blog for a few weeks. I am trying to get my grove back on blogging. Here is an easy recipe to begin. Lady’s Finger or Okra (known as Bhindi in Hindi and Vendakka in Malayalam) is a yummy vegetable but preparing it can be quite messy. It is sticky and needs extra care while cooking. Always use tender Okra for cooking as the more mature ones will be woody and fibrous.
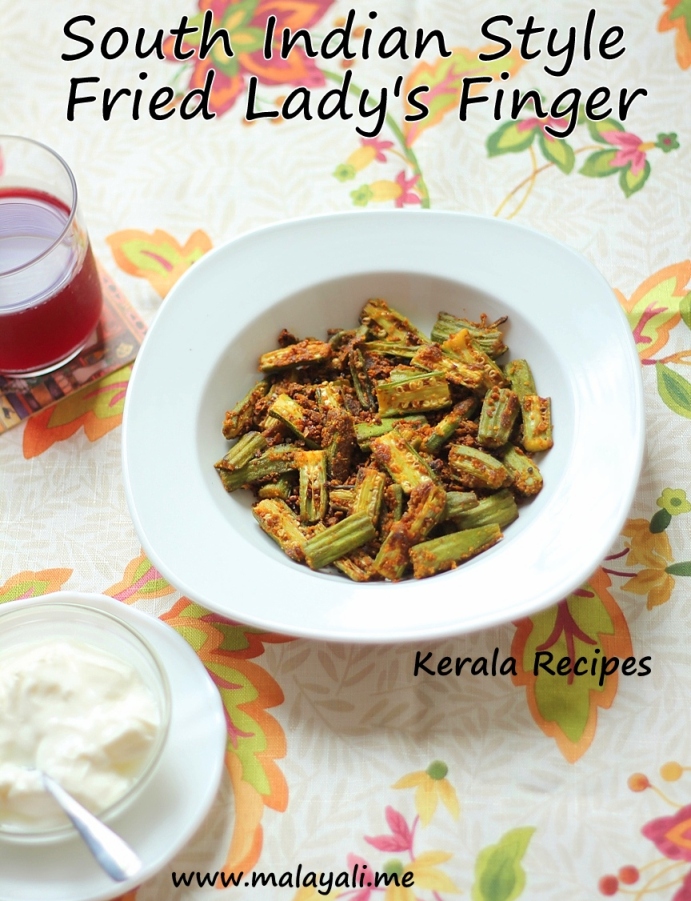
Vendakka Varuthathu

Vendakka Varuthathu

Rice Flour removes some of the sticky goo from the Okra and deep frying makes it crispy. I have stir fried the Lady’s Finger in this recipe but if you want a good crunch, feel free to deep fry it. The deep fried ones will disappear from your table in no time.
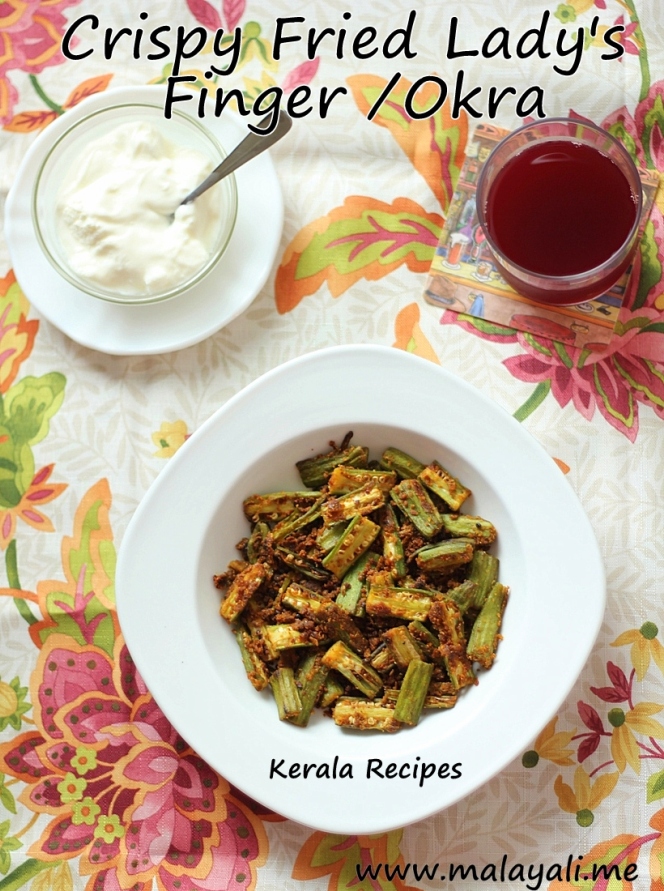
Crispy Fried Lady's Finger

Crispy Fried Lady’s Finger


Ingredients

  1. Lady’s Finger/Okra (Vendakka) – 15 to 20 large ones
  2. Turmeric Powder – 1/4 tsp
  3. Red Chilly Powder – 1/2 tsp
  4. Sambar Powder – 1.5 tsp
  5. Coriander Powder – 1/2 tsp
  6. Rice Flour – 2 tbsp
  7. Salt – to taste
  8. Coconut Oil – 1.5 tbsp

Preparation Method

  1. Wash the okra and trim the ends. Wipe away excess moisture using paper towels.
  2. Slice each Okra along its length into two halves and then dice it into 1″ long pieces.
  3. Marinate the Okra with Turmeric Powder, Red Chilly Powder, Sambar Powder, Salt and Rice Flour. Keep it aside for 10 minutes.
  4. Heat oil in a wide pan or skillet and add the okra pieces to the pan in a single layer.
  5. Allow it to cook for a 2-3 minutes on medium-high heat so that it browns a bit. Gently stir fry for another 6-7 minutes.
  6. Remove from heat when it becomes crispy. Serve immediately with rice.

 Note

  • If you wish, you may deep fry the Lady’s finger for 3-4 minutes and it will be really crispy.

Creamy Strawberry Yogurt

$
0
0

Flavored Yogurt is a very popular snack or dessert among people of all age groups. I love fruit-flavored Yogurt but I hate the ingredients found in most commercial flavored yogurt cups. Now-a-days, I make my own fruit yogurt for a quick dessert after lunch. I often use fruits like Mango, Blueberry and Strawberry for flavoring my yogurt. I wish I had started making these years ago instead of buying the commercial ones. It’s ridiculously simple to make and tasty.

Here is a super easy dessert which you can enjoy every day – Creamy Strawberry Yogurt. It is packed with flavor and doesn’t have any artificial ingredients.

Creamy Strawberry Yogurt

Creamy Strawberry Yogurt

When you can prepare homemade flavored yogurt so easily, I encourage all of you to ditch the commercial ones. Your kids will love this one!

Serves: 2

Ingredients

  1. Whole Milk Yogurt – 3/4 cup
  2. Frozen Strawberries – 8 ripe ones
  3. Real Maple Syrup – 1 to 2 tbsp (You can use any sweetener of your choice)

Preparation Method

  1. It’s best to use frozen strawberries in order to get a creamy texture. If you have fresh strawberries, wash it, trim the greens and then freeze it for half an hour to one hour.
  2. Blend the strawberries for a minute. Add the whole milk yogurt and maple syrup. Blend for another minute so that it is smooth and creamy. Do not over blend or else it will become runny.
  3. Serve immediately. Enjoy!

Note

  • Please use Plain Whole Milk Yogurt for this recipe. If you use Non-fat Yogurt, it will not be creamy.
  • You could also use Greek Yogurt instead of Whole Milk Yogurt.

Fish Cakes

$
0
0

I love Fish Cakes and Crab Cakes. They make such an excellent snack or appetizer. If you like Kerala Style Fish Cutlets, then I urge you to try this easy recipe for Fish Cakes. These fish cakes are gluten free as I haven’t used Bread Crumbs. Instead, I have used Almond Flour as a binding agent. You can use any mild-tasting Fish like Tilapia or Flounder for making Fish Cakes.

Pan-fried Fish Cakes

Pan-fried Fish Cakes

These fish cakes are pan-fried in very little oil and they are healthier than the deep fried ones. I am addicted to these fish cakes and could finish it all in one sitting. Well, I don’t do that as I have to share it with my husband. I don’t feel guilty when I indulge in these yummy Fish Cakes. After all, it’s only fish and isn’t laden with fat or carbs. Oh! it is grain-free as well.

Healthy Fish Cakes

Healthy Fish Cakes

Serves: 3 to 4

Ingredients

  1. White Fish Fillets – 3 medium
  2. Finely Minced Onions – 1/4 cup
  3. Turmeric Powder – 1/4 tsp
  4. Red Chilly or Cayenne Pepper Powder – 1/4 tsp + 1/4 tsp
  5. Garlic Powder – 1/4 tsp
  6. Black Pepper Powder – 1/4 tsp
  7. Dried Parley Flakes – 1 tsp (optional)
  8. Egg – 1
  9. Dessicated Coconut – 1 tbsp
  10. Almond Flour – 2 tbsp approx (I made my own by powdering Almonds in a mixie)
  11. Salt – to taste
  12. Oil – 1.5 to 2 tbsp

Preparation Method

  1. Wash and pat dry the fish fillets with a paper towel.
  2. Marinate the fillets with 1/4 tsp turmeric powder, 1/4 tsp Red Chilly Powder and a little salt. Keep it aside for 5 minutes.
  3. Heat 1-2 tsp oil in a wide non-stick pan or skillet. Place the fillets on the pan and allow it to cook for 3-4 minutes on medium heat.
  4. Gently flip the fillets and let it cook for another 2-3 minutes. Do not worry if the fillets break or fall apart. Remove from heat. Once cooled, transfer it to a bowl and flake it with a fork.
  5. Add garlic powder, black pepper powder, 1/4 tsp red chilly powder, dried parsley flakes, egg, dessicated coconut and chopped onions to the bowl.
  6. Start mixing everything together with your hands. Add 1 to 2 tbsp almond flour as needed. Shape it into mini-patties.
  7. Heat 1 tbsp oil in a skillet or frying pan on medium heat. Gently fry the fish cakes for 3-4 minutes on each side or until browned.
  8. Drain onto paper towels. Serve with ketchup, tartar sauce or any sauce of your choice.

Note

  • You can make your own Almond Flour at home by powdering Almonds using a Spice Grinder or Mixie.
  • These fish cakes are delicate. Do not overcrowd the pan and be careful while flipping it.


Kappa Vevichathu (Mashed Yuca with Coconut)

$
0
0

I cannot believe that I haven’t posted the recipe for Kappa Vevichathu. I have made it so many times and yet I never manged to click a decent snap! Tapioca/Yuca (Kappa) is so popular among Keralites. I grew up eating Tapioca every once in a while. As a child, I wasn’t fascinated with Kappa but I remember how insanely happy my Mom and aunts would be at the sight of Kappa. Well, I grew up and got married to a man who loves all kinds of tubers – be it Tapioca, Taro or Potato. I make different dishes using Tapioca and Kappayerachi has got to be one of my favorites.

Kappa Vevichathu

Kappa Vevichathu

This recipe isn’t all that complicated except for the part where you have to peel Yuca. I often buy Frozen Yuca so that I don’t have to worry about cleaning it and losing my finger! Tapioca is cooked along with coconut and a few spices, the result being a yummy dish. Kappa Vevichathu is often served with spicy Kerala Style Fish Curry (Meen Curry). Here is the recipe for Kottayam Style Kappa Vevichathu. A few of the ingredients like garlic are traditionally not used but my mother-in-law always adds it to reduce the gastric problems caused by Yuca. My friend’s Mom from Angamaly makes something similar with Tapioca but they call it Manja Kappa.

Kerala Style Tapioca with Coconut

Kerala Style Tapioca with Coconut

In case you are wondering, the side dish pictured above is Meen Chammanthi Podi – a powder made using Dried Fish and Coconut.

Ingredients

  1. Fresh/Frozen Tapioca/Yuca (Kappa) – 1 kg or 2.2 lbs approx
  2. Grated Coconut – 1 cup
  3. Shallots (Kunjulli) – 2 small
  4. Green Chillies – 2 or 3 (Alter according to your spice tolerance)
  5. Curry Leaves – 1 big sprig
  6. Garlic – 4 big cloves
  7. Turmeric Powder – 1/4+ 1/4 tsp
  8. Salt – to taste
  9. Water – as needed

Preparation Method

  1. If using Fresh Tapioca, peel the outer brown skin and inner pink skin. Chop the edges and cut it into medium-sized pieces. Wash it thoroughly a couple of times.
  2. Boil the tapioca pieces in plenty of water along with salt and a 1/4 tsp turmeric until tender. This will take anywhere between 10-20 minutes depending on the type of Yuca used. Be careful not to overcook the tapioca or else it will end up being mushy.
  3. Drain the water thoroughly and keep the tapioca pieces aside. Reserve 1/4 cup of the starchy water.
  4. Grind coconut, shallots, green chillies, garlic, a few of the curry leaves and 1/2 tsp turmeric powder to form a very coarse paste.
  5. To the same pan used for boiling the Tapioca, add the cooked tapioca pieces, coconut mixture, remaining curry leaves.
  6. Cover and cook for 3-4 minutes on low heat. If it appears dry, add a few tablespoons of the reserved water. Remove lid and mix everything thoroughly. Add more salt if needed. Mash the pieces thoroughly using the back of a wooden spatula but I prefer leaving a few chunks to bite.
  7. Remove from heat and serve with Fish Curry or Mulakku Pottichatu (Chilly Chutney).

Notes

  • I have sometimes added a little Cumin (Jeerakam) while grinding Coconut but it is not used traditionally. The same applies to garlic.
  • If you don’t have green chillies, you can instead use red chilly powder.
  • You don’t have to grind curry leaves but my Mom usually grinds it along with the coconut and I love the taste.


Uppu Manga Chammanthi

$
0
0

My aunt gave me some salt-brined raw mangoes (Uppu Maanga) from Kerala and I was happy. Unripe, tender Mangoes are preserved in Kerala by brining it in salt solution. Well-brined Mangoes stay unspoiled for over a year. These brined, green Mangoes can be used for making Curries, Pickles and Condiments. My mom often makes pickles with Uppu Maanga.

Uppu Maanga Chammanthi

Uppu Maanga Chammanthi

I have fond memories associated with Uppu Manga. Whole Green Mangoes or cut mangoes immersed in a salt solution would be stored away safely in a Bharani (Ceramic Jar) for later use. The thought of Kanji served with crushed Uppu Manga makes me drool. Here is the recipe for Uppu Manga Chammanti (Brined Mango Coconut Chutney). Chammanthi is usually a thick paste made by grinding coconut with other ingredients. Since brined mangoes retain lot of water, this Chammanthi wasn’t as thick as the other Chammanthis.

Salt Brined Mango Chutney

Salt Brined Mango Chutney

Uppu Manga Chammanthi makes a  wonderful accompaniment to Rice or serve it with Kanji.

Ingredients

  1. Diced Uppu Manga (Brined Mango) Pieces – 1/2 cup
  2. Grated Coconut – 3/4 to 1 cup
  3. Green Chillies – 2
  4. Ginger – a small piece
  5. Curry Leaves – 3 to 4
  6. Salt – to taste

Preparation Method

  1. Blend everything together in a mixie or food processor until you get a coarse paste.
  2. Add salt only if required.

 Note

  • If you don’t have brined mangoes, you can make Chammanthi with sour, green mangoes.

Potato Carrot Casserole

$
0
0

I had been wanting to try American Baked Casseroles for a long time. I decided to start with a simple casserole made with Potatoes and Milk. I found this recipe while glancing through a Library Book and decided to adapt it with whatever ingredients I had on hand. I used carrots and ham along with potatoes and instead of bread crumbs, I used gluten-free Rice Cereal for the topping. The whole house smelled so wonderful while the casserole was in the oven. We enjoyed this wonderful Potato and Carrot Casserole for dinner and thought it tasted simple and satisfying.

Potato Carrot Casserole

Potato Carrot Casserole

Only after making did I realize that the quantity was just right to satisfy our appetites. Next time, I will try using more layers of potatoes. This time my 2 quart pan was only half full.

Serves: 2 to 3

Ingredients

  1. Potatoes – 4 Medium
  2. Carrots – 3 large
  3. Diced Ham – 1/2 cup (fully cooked)
  4. Milk – 1 and 1/4 cup
  5. Onion Powder – 1/2 tsp
  6. Garlic Powder – 1/4 tsp
  7. Black Pepper Powder – 1/4 tsp
  8. Cayenne Powder or Red Chilly Powder – 1/2 tsp
  9. Dried parsley Flakes – 1/2 tsp (optional)
  10. Salt – to taste
  11. Chex Rice Cereal – 1 cup
  12. Butter – 2 tbsp + 1 tbsp and more for greasing

Preparation Method

  1. Peel the potato and slice it into discs of 1/4″ thickness or smaller.
  2. Peel the carrot and dice it into discs.
  3. Heat 2 tbsp butter and 1 cup milk on low heat until the butter melts.
  4. Remove from heat and whisk the milk-butter mixture with salt, pepper, onion powder, garlic powder, parsley flakes and paprika powder.
  5. Preheat oven to 400 degree F. Grease a 9″ X 4″ (2 qt) oven-safe dish with butter.
  6. Spread half of the potatoes in a single layer at the bottom of the dish.
  7. Place the carrots and diced ham on top of the potatoes.
  8. Top with the remaining potatoes. Pour the milk mixture into the pan making sure that the potatoes are covered.
  9. Crush the rice cereal and combine it with 1 tbsp melted butter. Sprinkle it on top of the casserole.
  10. Cover and bake the casserole for around 30 minutes. Uncover and cook for 10 more minutes or until the milk has been absorbed by the potatoes and the top is set.

Note

  • The rice cereal topping is optional but it really enhances the taste of the casserole.
  • You can also use bread crumbs instead of Chex cereal.
  • If you like Cheese, you can sprinkle any shredded Cheese like Cheddar or Parmesan on top of the casserole before baking.

Cabbage and Raisin Salad

$
0
0

When I serve Meat or Fish as a main dish, I often make a simple salad as a side. Those kind of days are few since I tend to stick to Indian food for Lunch and Dinner. Indian food is usually high in carbs and I often end-up feeling guilty if I have too much rice with all the yummy curries. So once in a while, I tend to make my meal high in protein and low in carbs. A few days ago, a friend shared the recipe for Cabbage & Ramen Noodle Salad and it sure sounded delicious. I didn’t have Ramen Noodles and decided to instead try out a simple Sweet & Tangy Cabbage Salad.

Sweet & Tangy Cabbage Salad

Sweet & Tangy Cabbage Salad

Okay, I am going to tell you something. I like Cabbage but I don’t like Coleslaw! I somehow dislike all the Mayo on it. It is often way too creamy and sweet for my taste buds. This Cabbage & Raisin Salad has a nice crunch and the sweet-sour flavors are well-balanced. I managed to eat a huge bowl of this yummy Cabbage Salad along with Crunchy Battered Fish pictured above. This salad is gluten-free as ramen noodles are not used.

Cabbage Raisin Salad

Cabbage Raisin Salad

Ingredients

  1. Shredded Cabbage – 1/2 head of 1 green Cabbage
  2. Raisins – 1/4 cup
  3. Black Sesame Seeds – 1 tsp
  4. Apple Cider Vinegar – 1 to 1.5 tbsp
  5. Honey – 1 tbsp (Alter according to desired sweetness)
  6. Garlic Powder – 1/4 tsp
  7. Black Pepper Powder – 1/4 tsp
  8. Salt – to taste
  9. Olive/Coconut Oil – 1 tbsp

Preparation Method

  1. Wash the Cabbage and shred it into strips.
  2. Toast the sesame seeds on low heat for a few minutes, stirring continuously.
  3. Combine the cabbage, raisins and toasted sesame seeds in a bowl.
  4. Prepare the dressing by whisking together apple cider vinegar, honey, garlic powder, oil and salt in a bowl.
  5. Pour the dressing over the salad and toss everything.
  6. Allow the salad to sit in the refrigerator for a 15-20 minutes so that the flavors are absorbed by the cabbage.
  7. Leftovers may not taste good as cabbage tends to let out water as it sits.

Vellarikka Payaru Erisheri

$
0
0

I had some fresh Vellarikka (Sambar Cucumber) and Achinga Payaru (Yardlong Beans) with me. Thanks to two wonderful ladies who shared their home-grown vegetables with me! I made a Mezhkkupuratti with tender Achinga. I separated the beans from the more fibrous Yardlong Beans and discarded the pods. I didn’t know what to do with it and decided to try something similar to Mathanga Vanpayaru Errisery. I also used Lentils (Parippu) while making this Erishery.

Vellarikka Payaru Erishery

Kerala Style Vellarikka Payaru Erishery

Vellarikka (Melon Cucumber) is known as Dosakai in some parts of India and belongs to the Gourd family. It is usually greenish-yellow in color and comes in all shapes and sizes. It is often added to Sambar. You can also make Pickles and Pachadis with it. Once cooked, Vellarikka is very similar to Pumpkin. It becomes mushy with a thick consistency.

Sambar Cucumber and Lentil Erisseri

Sambar Cucumber and Lentil Erisseri

So if you have Vellarikka with you, try this Velarikka Payaru and Parippu Erisheri for Onam.

Ingredients

  1. Vellarikka (Sambar Cucumber) – 1 small
  2. Achinga Payaru (Yardlong Beans)  – 1/2 cup (beans separated from the pods)
  3. Dried Split Green Peas (Pacha Parippu) – 1/2 cup
  4. Garlic – 2 cloves
  5. Turmeric Powder – 1/4 tsp
  6. Salt – to taste
  7. Water – as needed

For Grinding

  1. Grated Coconut – 1 cup
  2. Garlic – 4 cloves
  3. Cumin (Jeerakam) – 1/2 tsp
  4. Red Chilly Powder – 1/2 tsp
  5. Black Pepper Powder – 1/4 tsp

For Seasoning

  1. Sliced Shallots – 4
  2. Dry Red Chillies – 3 or 4
  3. Mustard Seeds – 1/4 tsp
  4. Coconut Oil – 1 tbsp
  5. Curry Leaves – a big sprig

Preparation Method

  1. Peel the cucumber and cut it into halves along the centre. Scoop out the seeds and dice it into medium chunks.
  2. Remove the beans from the mature and fibrous yardlong beans and discard the pods.
  3. Wash and drain the split green peas.
  4. Pressure cook the cucumber, payaru and split green peas in 2 cups of water along with 2 garlic cloves, 1/4 tsp turmeric powder and salt to taste for 1 whistle on medium-high heat.
  5. Meanwhile, in another pan, roast the grated coconut on medium heat, stirring frequently. Once the coconut begins to brown, reduce heat, add the garlic and red chilly powder. Roast for a few more minutes. Remove from heat and allow it to cool. Grind everything to a smooth paste along with 1/4 tsp cumin, 1/4 tsp black pepper powder and little water.
  6. Once the pressure has subsided, open the cooker and add the roasted coconut paste to the pan. If the erisheri appears very thick, add a little water. Simmer for five-seven minutes, stirring occasionally. Add more salt if needed.
  7. Heat 1 tbsp coconut oil in a another pan and splutter mustard seeds. Throw in the shallots, red chillies and curry leaves. Saute until the shallots turn golden brown. Pour this seasoning over the Erishery. Mix and remove from heat.

Note

  • You can use any lentil/dal like Cherupayaru Parippu (Split Mung beans) or Tuvara Parippu (Toor Dal) instead of Split Green Peas.
  • If you don’t have Achinga Payaru, you can leave it out. Vellarikka and Parippu will suffice for this Erissery.

Cherupayaru Payasam

$
0
0

Now that Onam is around the corner, I am here with the recipe for Cherupayaru Payasam. This is a sweet dessert made with Moong/Mung Beans or Green Gram (Cherupayaru). This is a very rich and creamy dessert. A little will go a long way to satisfy your sweet cravings. Though I have made Pradhaman with Cherupayaru Parippu (Moong Dal), this was the first time I tried a Payasam with Whole Mung Beans. When I spoke to an aunt, she told me that Cherupayaru Payasam used to be prepared for Onam at their place by her mother and grandmother.

Cherupayaru Payasam

Cherupayaru Payasam

Traditionally, Cherupayaru Payasam is made in Coconut Milk and the moong beans are fried before it is cooked. It is slow-cooked and requires lot of time and effort. This recipe is a quicker version of making Cherupayaru Payasam. I didn’t fry the beans before pressure cooking, also used both Coconut Milk and Condensed Milk for extra creaminess.

Whole Moong Bean Payasam

Whole Moong Bean Payasam

As you get ready for Onam this year, try making this wonderful payasam and I am sure you will like it. The only problem is that you won’t be able to resist yourself until you empty the bowl.

Serves: 8

Ingredients

  1. Whole Mung Beans (Cherupayaru) – 1 cup
  2. Jaggery (Sharkara) – 300 grams approx (3 medium blocks)
  3. Thin Coconut Milk – 2 cups
  4. Condensed Milk – 1/4 cup
  5. Powdered Cardamom (Elakka) – 1.5 tsp
  6. Salt – a pinch
  7. Ghee – 1+1 tsp
  8. Grated Coconut – 3 tbsp
  9. Water – 3 cups

Preparation Method

  1. Wash the mung beans thoroughly. Pressure cook it with 2 cups of water for 3 whistles on medium-high heat.
  2. Meanwhile, boil the jaggery in 1 cup of water so that it melts completely. This will take around 10 minutes. Filter to catch any residue and keep the jaggery syrup aside.
  3. Once the pressure has subsided, open the pan and check if there is water at the bottom. If so, heat the beans for a few more minutes until the water has evaporated completely. The beans should be well-cooked but shouldn’t become a paste.
  4. Heat a wide pan and transfer the cooked cherupayaru to the pan and gently pour in the jaggery syrup.
  5. Add a pinch of salt and 1.5 tsp powdered cardamom. Let the mixture cook on medium-low heat for around 5 minutes. Keep on stirring the mixture as it thickens.
  6. Now pour in the thin coconut milk and allow everything to come to a slow boil, stirring frequently so that it doesn’t stick to the pan.
  7. Add 1 tsp of ghee to the payasam. Simmer the payasam for five-seven minutes.
  8. Reduce heat and add 1/4 cup of condensed milk. Mix well and remove from heat after a minute or two. Alternatively, you can add 1/2 cup of thick Coconut Milk.
  9. Heat 1 tsp ghee in another pan and roast the grated coconut on medium heat until it becomes a deep brown color. Add the roasted coconut to the payasam for added taste.

Note

  • You may need to adjust the amount of jaggery used depending on the sweetness. I used around 300 grams and it was sweet enough for us.
  • Fresh Coconut Milk is recommended but you can also get away with Canned Coconut Milk or Coconut Milk Powder. If using the Powder, make sure that you dissolve it completely in water before adding it to the Payasam. You don’t want to see the undissolved powder floating around in the payasam.


Carrot Kichadi

$
0
0

Wishing you all a very Happy Onam!!! Hope you all enjoyed a wonderful Sadhya with family and friends. We had a yummy Sadhya at a friend’s house. Here is an Onam Sadhya special side dish – Carrot Pachadi/Kichadi. I usually make Pachadi for Onam with Pineapple but this time I thought I would make a Pachadi with Carrot since I didn’t have Beetroot. I add ground mustard seeds while making Pachadi but yesterday while speaking to a friend, she told me that they don’t add ground mustard seeds to some Pachadis such as Beetroot whereas for Pavakka (Bitter Gourd) and Vellarikka (Melon Cucumber) Pachadis, ground mustard is always added.

Carrot Pachadi

Carrot Pachadi

To add to the confusion, Pachadi is often known as Kichadi in southern Kerala. The terminology has always been confusing to me, but I guess Pachadi and Kichadi are more or less the same with a few subtle differences. I read somewhere that ground mustards are not added to Kichadis. I prepared this dish without ground mustards so I think I will call it Carrot Kichadi. This is a very mild side dish and is perfect for Onam.

Kerala Carrot Pachadi

Kerala Carrot Pachadi/Kichadi

Serves : 5 to 6

Ingredients

  1. Carrot – 2 large
  2. Slit Green Chillies – 2
  3. Thick Curd – 1/4 cup
  4. Salt – to taste
  5. Sugar – 1 to 2 tsp (optional)

For Grinding

  1. Grated Coconut – 1/2 cup
  2. Turmeric Powder – 1/4 tsp
  3. Chopped Ginger – 2 tsp approx

For Seasoning

  1. Coconut Oil – 1 tbsp
  2. Mustard Seeds – 1/4 tsp
  3. Dry Red Chillies – 3 or 4
  4. Curry Leaves – a big sprig

Preparation Method

  1. Peel the carrots and shred it using a hand grater or food processor.
  2. Cook the carrots with little water, slit green chillies and salt to taste for around 5-7 minutes.
  3. Grind coconut along with the green chillies from the carrot and the other ingredients (turmeric and ginger) to form a nice paste and keep aside.
  4. Blend the curd with little salt until smooth and keep aside.
  5. Once the carrots are cooked, add the ground coconut paste to the pan.
  6. Continue cooking on medium heat for another 5-8 minutes so that it becomes thick.
  7. Reduce heat and add the curd to the pan. Mix everything and remove from heat. Add sugar if you like it sweet.
  8. Heat oil in a pan. Splutter mustard seeds, saute dry red chillies and curry leaves for a few minutes.
  9. Pour the seasoning over the Carrot Pachadi. Mix gently.

Notes

  • Sour Curd is usually preferred while making Pachadi and Kichadi. However, you can also use Yogurt if you don’t have curd.
  • If you want to make this Pachadi a bit sweet, you can add 1-2 teaspoons of sugar or powdered jaggery.


Raw Plantain Stir Fry (Vazhakka Mezhukupuratti)

$
0
0

Raw Banana is known as Kaya in Malayalam. Unripe Bananas are used for making different side dishes in Kerala. Raw Plantains (Vazhakka) are mostly used for making Thoran, Mezhkkupuratti, Erisheri and so on. A friend told me that they cook Raw Plantains with Tapioca/Yuca and it tastes excellent. Vazhakka is also cooked with different kinds of Payaru (Beans) such as Achinga Payaru, Cherupayaru, Vanpayaru etc.

Vazhakka Mezhukkupuratti

Vazhakka Mezhukkupuratti

I had some Unripe Plantain (Pacha Ethakka/Nendhrakka) and made a simple stir fry with it. If you don’t have Raw Plantains, you can use Raw Bananas (Pacha Kaya) for the same recipe. I removed the outer skin of the raw plantains. However, some people like to cook it with skin. Here is the recipe for Vazhakka or Pacha Kaya Mezhkupuratti.

Raw Plantain Stir Fry

Raw Plantain Stir Fry

Serves: 5 to 6

Ingredients

  1. Raw Plantain – 2 big
  2. Turmeric Powder – 1/4 tsp
  3. Diced Shallots (Kunjulli) – 5 or6 (Alternatively use diced Onions)
  4. Minced/Crushed Garlic – 4 cloves
  5. Red Chilly Flakes – 1 tsp
  6. Red Chilly Powder – 1/2 tsp
  7. Black Pepper Powder – 1/4 tsp
  8. Curry Leaves – a sprig
  9. Coconut Oil – 1 tbsp + 1 tsp
  10. Mustard Seeds – 1/4 tsp
  11. Salt – to taste

Preparation Method

  1. Trim the edges of the plantain and lightly peel the thick outer skin. Dice it into small cubes. Soak it in water for five minutes and then wash it in several changes of water. This will remove the stickiness (kara).
  2. Boil the plantain pieces in plenty of water along with 1/4 tsp turmeric powder and salt to taste until soft. It may take 7-8 minutes for the pieces to get cooked. Drain excess water and keep it aside. (You can also cover and cook the plantain with very little water but it may end up mushy. I prefer boiling it in plenty of water and then draining it.)
  3. Heat 1 tbsp oil in a skillet and splutter mustard seeds. Saute shallots, curry leaves and garlic until the shallots begin to lightly brown.
  4. Add the cooked plantain pieces to the skillet. Add 1/2 tsp red chilly powder and 1 tsp red chilly flakes. Add salt only if needed. Mix everything and then spread it out as much as possible.
  5. Allow the plantain pieces to lightly brown on the edges, stirring occasionally for 5-7 minutes. Add 1/4 tsp black pepper powder and toss everything.
  6. Finally, drizzle 1 tsp of coconut oil to coat the pieces. Remove from heat and serve with Rice.

Note

  • I prefer making Vazhakka Mezhkkupuratti completely dry but if you like it slightly mushy, just sprinkle a few tea spoons of water and keep it covered while cooking instead of allowing it to brown.


Fish Masala Curry

$
0
0

Unlike Meat, I never get tired of Fish. I can have it every day. I keep trying new recipes with Fish and a few days back, I was reminded of the Fish Masala which was served for our Wedding Reception. I didn’t have the exact recipe but decided to explore it myself with probable ingredients. It turned out to be a yummy Fish Curry. Unlike Kerala Style Fish Curries, the most notable Indian spice mixture which stands out in this Fish Curry is Garam Masala.

Indian Fish Masala Curry

Indian Fish Masala Curry

This fish curry is more similar to Meat based Curries and is very flavorful and aromatic. The gravy is rich and tasty as Coconut Milk is used. It goes well with Indian Breads. We even had it with Oats Puttu for Breakfast.

Fish Curry with Indian Spices

Fish Curry with Indian Spices

Ingredients

  1. Fish – 1.5 lbs
  2. Sliced Onions – 1
  3. Diced Tomatoes – 2 medium
  4. Curry Leaves – 2 sprigs
  5. Ginger Garlic Paste – 1 tbsp
  6. Coriander Powder – 1.5 tbsp
  7. Kashmiri Chilly/Paprika Powder – 1 tsp
  8. Fenugreek (Uluva) Powder – 1/4 tsp
  9. Garam Masala Powder – 1 tsp + 1/4 tsp
  10. Fennel Seeds (Perum Jeerakam) Powder – 1/2 tsp
  11. Tamarind Paste – 1 tbsp
  12. Thin Coconut Milk – 2 cups
  13. Sugar – 1 tsp
  14. Cilantro (Malliyella) – a few for garnishing
  15. Oil – 2 tbsp
  16. Mustard Seeds – 1/4 tsp
  17. Salt – to taste
  18. Lemon Juice – 2 tbsp

For Marinating the Fish

  1. Ginger Garlic Paste – 1 tbsp
  2. Turmeric Powder – 1/2 tsp
  3. Red Chilly Powder – 1 tsp
  4. Kashmiri Chilly/Paprika Powder – 1 tsp
  5. Black Pepper Powder – 1/2 tsp
  6. Salt – to taste

Preparation Method

  1. Clean the fish and dice it into medium sized pieces. Soak it in water along with 2 tbsp lemon juice for five minutes. Wash it a couple of times and keep aside.
  2. Marinate the fish with the above ingredients and refrigerate it for at least half an hour.
  3. Heat 2 tbsp oil in a pan and splutter mustard seeds. Saute onions and and a sprig of curry leaves until the onions become translucent.
  4. Add the tomatoes and let it cook until soft and mushy. Reduce heat and add ginger garlic paste. Saute for two minutes.
  5. Add coriander, kashmiri chilly and fenugreek powders. Saute everything until the oil begins to separate from the mixture.
  6. Next, pour in the thin coconut milk to the pan. Add the tamarind paste, 1 tsp sugar and salt to taste. Mix everything so that the tamarind dissolves.
  7. Sprinkle garam masala and fennel seeds powder. Allow the gravy to come to a slow boil on medium heat.
  8. Gently add the fish pieces and give the pan a swirl. Cover and cook for 12-15 minutes, swirling the pan occasionally.
  9. Finally, open the pan and sprinkle 1/4 tsp garam masala powder. Remove from heat after two minutes. Garnish with another sprig of curry leaves and a few cilantro leaves. Keep covered.

Note

  • I have used Cod Fillets for this curry. It is best to use any mild tasting White Fish for this recipe.
  • Fresh Ginger Garlic Paste is always recommended.
  • If using Canned Coconut Milk, dilute it with water to get the required consistency.
  • If you don’t have tamarind paste, you can use tamarind extract. Soak 1 tbsp of tamarind pulp in 1/2 cup of hot water for 5-10 minutes or microwave it for a minute. Mash the pulp well and then strain the tamarind water.

Baby Food: Mixed Vegetables with Indian Spices

$
0
0

It’s been a long, long time since I have been away from my beloved blog. Where do I start? What do I say? The last eighteen months of blog silence meant I was busy at home preparing for bigger things. The first nine months were spent growing a beautiful life inside me and the next nine months taking care of the precious little one God has blessed us with. Our hearts and home have grown with two little feet and I have a cheerful nine month old to keep me busy.

I hope to ease back into blogging but I have no guarantees with my bumble bee keeping me on my toes. Now that I am cooking lots of meals for my little one, I thought I would start with a simple recipe for baby food. My little munchkin has been a good eater and we started solids around the 5 month mark. He likes vegetables and I cook all his food without salt and sugar.

Here is the recipe for Mashed Vegetables made with lot of spices used in Indian Cuisine. I have used Sweet Potatoes, Carrots, Cauliflower, Tomato and Green Peas in this recipe. Cauliflower can be a little gassy for babies and so I waited till nine months before introducing it. You can use other vegetables like Zucchini, Broccoli, Pumpkin and so on.

Mixed Vegetables with Indian Spices

Mixed Vegetables with Indian Spices

Age: 8+ months

Ingredients

  1. Sweet Potatoes – 2 medium
  2. Carrots – 3 big ones
  3. Cauliflower florets – separated from half of a medium sized cauliflower
  4. Tomato – 1 medium
  5. Frozen Green Peas – 1/2 cup
  6. Onion powder – 1/4 tsp
  7. Garlic Powder – 1/4 tsp
  8. Paprika Powder – 1 tsp (Alternatively, use 1/2 tsp of Kashmiri Chilly Powder)
  9. Coriander Powder – 1 tsp
  10. Fennel Seeds (Perumjeerakam) Powder – 1/2 tsp
  11. Cumin Seeds (Jeerakam) Powder – 1/4 tsp
  12. Water – 1/2 to 1 cup

Preparation Method

  1. Wash all the vegetables thoroughly. Peel the carrots and sweet potatoes. Dice everything into small pieces except the green peas.
  2. Thaw the green peas by washing it in warm water.
  3. Cover and cook all the vegetables in 1/2 cup of water for 10 minutes, stirring occasionally.
  4. Add all the spice powders to the pan. Cover and cook for 10 more minutes. If the mixture seems dry, add a little more water so that it doesn’t stick to the bottom of the pan.
  5. Once cooked, the sweet potatoes and carrots should be very soft. Mash everything with a spatula to a chunky consistency. If your baby cannot tolerate texture, you can puree it to a smooth consistency using a mixie/blender by adding a little bit of water.
Mashed Vegetables with Indian Spices

Mashed Vegetables with Indian Spices

Note

  • Some babies find it difficult to chew the skin of green peas if they are not used to textures. My son likes the texture of green peas and so I have included it in this recipe.

Baby Food: Oats with Mashed Potatoes

$
0
0

Oats are an excellent way to include grains in your baby’s diet. You can start introducing Oatmeal from around 6 months. Since oatmeal is rich in fiber, it is less likely to cause constipation in babies compared to Rice Cereal.  Rather than buying commercial Oat Cereal, you can easily prepare it at home. Grind Rolled or Quick Cooking Oats into a powder and store it in a container. Cook it with water and then mix with fruit or vegetable purees for an easy breakfast.

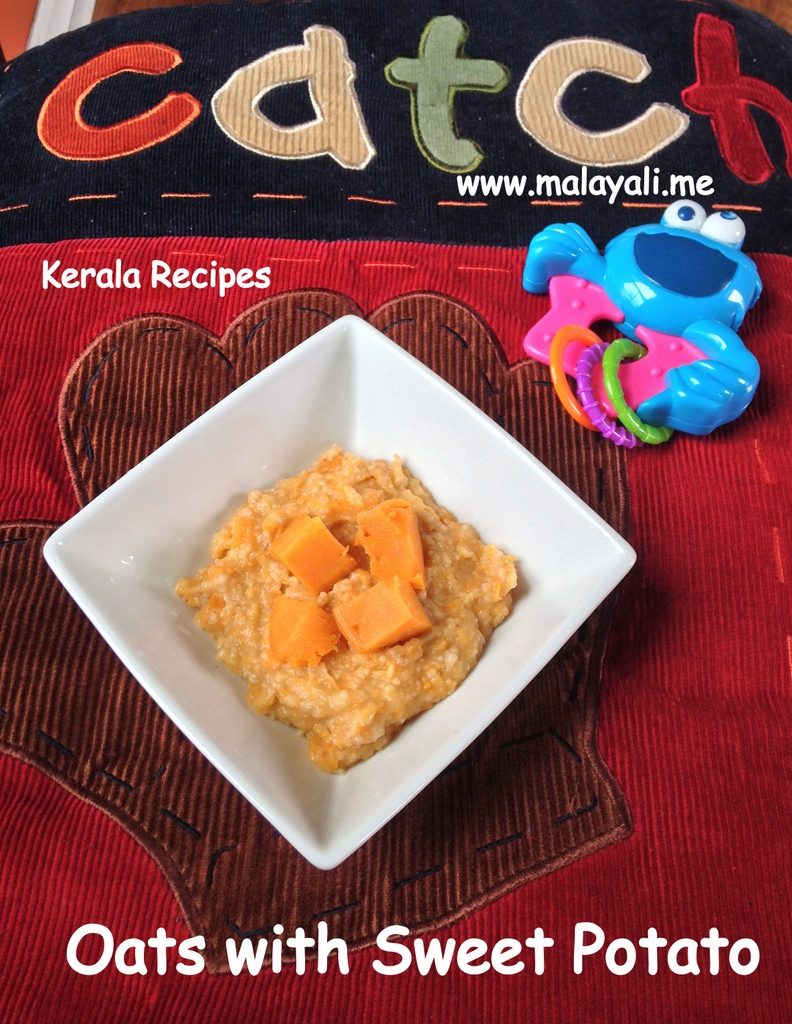
Oatmeal with Mashed Sweet Potatoes

Oatmeal with Mashed Sweet Potatoes

I started giving my little one Oats when he turned seven months. Initially, I would powder oats very finely and then cook it in water. Now a days, I coarsely grind the oats as he can tolerate texture. I often add bananas, blue berries, pears, apples, sweet potatoes and other fruits or veggies to his oatmeal.

Age: 6+ months

Ingredients

  1. Powdered Oats (Quick Cooking or Rolled/Traditional/Old Fashioned) – 2 tbsp
  2. Water – 1/2 to 3/4 cup
  3. Steamed and diced Sweet Potatoes – 1/2 cup (See Notes)
  4. Cinnamon – a small pinch (optional)

Preparation Method

  1. Grind 1 cup of Oats into a smooth or coarse powder depending on whether your baby can tolerate texture or not. Store it in an airtight container and keep it in a cool place. Best to use it within one or two weeks.
  2. Bring 1/2 to 3/4 cup water to a boil in a small saucepan. Reduce heat to medium and add 2 tbsp of oats and cinnamon. Keep stirring for 3-4 minutes so that the mixture thickens and there are no lumps. You can add more water for a thinner consistency.
  3. Mash the sweet potatoes and mix it with the oats. Serve warm.

Notes

  • I like to cook sweet potatoes in bulk and then use it for different meals throughout the week. Here is how I cook Sweet Potatoes. Wash and peel 3 large sweet potatoes. Dice it into small pieces. Steam it for around 10-15 minutes until soft. If your baby is just starting on solids, puree the sweet potatoes along with water to a smooth paste. If your baby can tolerate finger foods, you can give soft cooked pieces.
  • I sometimes cook oats in Cow’s Milk instead of water. Be sure your baby doesn’t have Dairy Allergies if you are using Milk.
Homemade Oatmeal with Sweet Potatoes

Homemade Oatmeal with Sweet Potatoes

Strawberry Banana Coffee Cake

$
0
0

Wow! I am back to my blog after another long year. Even though I love blogging and wish to spend every waking minute on my blogs, it doesn’t happen because my toddler needs Mama and I hardly catch a break. This afternoon, I baked a simple and yummy cake for my little one. It’s summer and strawberries are available everywhere. I had a few overripe bananas sitting on the counter calling for my attention. I decided to make a basic cake using Strawberries and Banana because my sister had made it sometime back and we loved it.

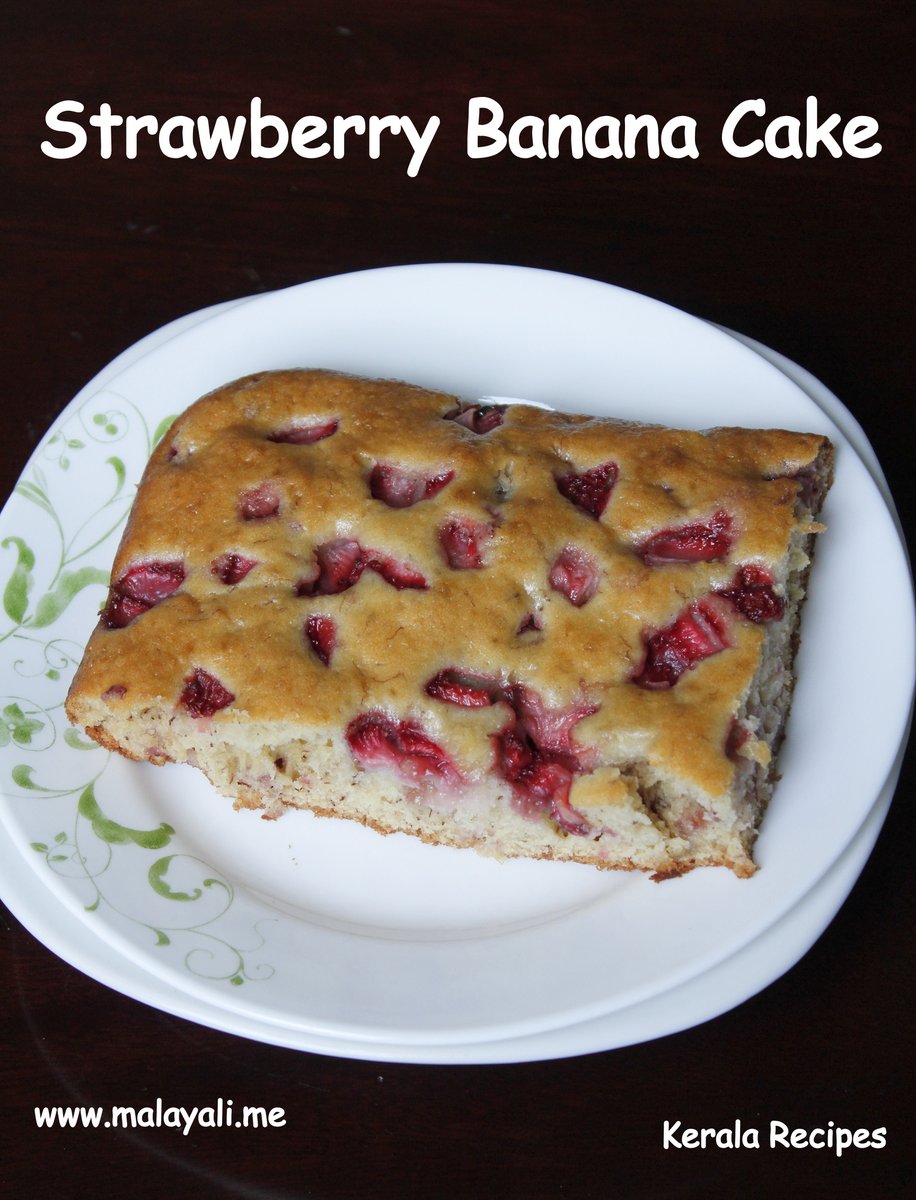
Strawberry Banana Cake

Strawberry Banana Cake

If you google for Strawberry Cakes, you will most likely find recipes which use the box cake variety. This recipe is similar to the Banana Chocolate Cake I often make from scratch for birthdays and other occasions. It is sweet and moist and you will love every bite as you dig into the sweet and sour strawberries. Enjoy this yummy Strawberry Banana Cake with your evening coffee or tea. There are no hard and fast rules here. Why don’t you serve it for Brunch or even Breakfast next time? 😉

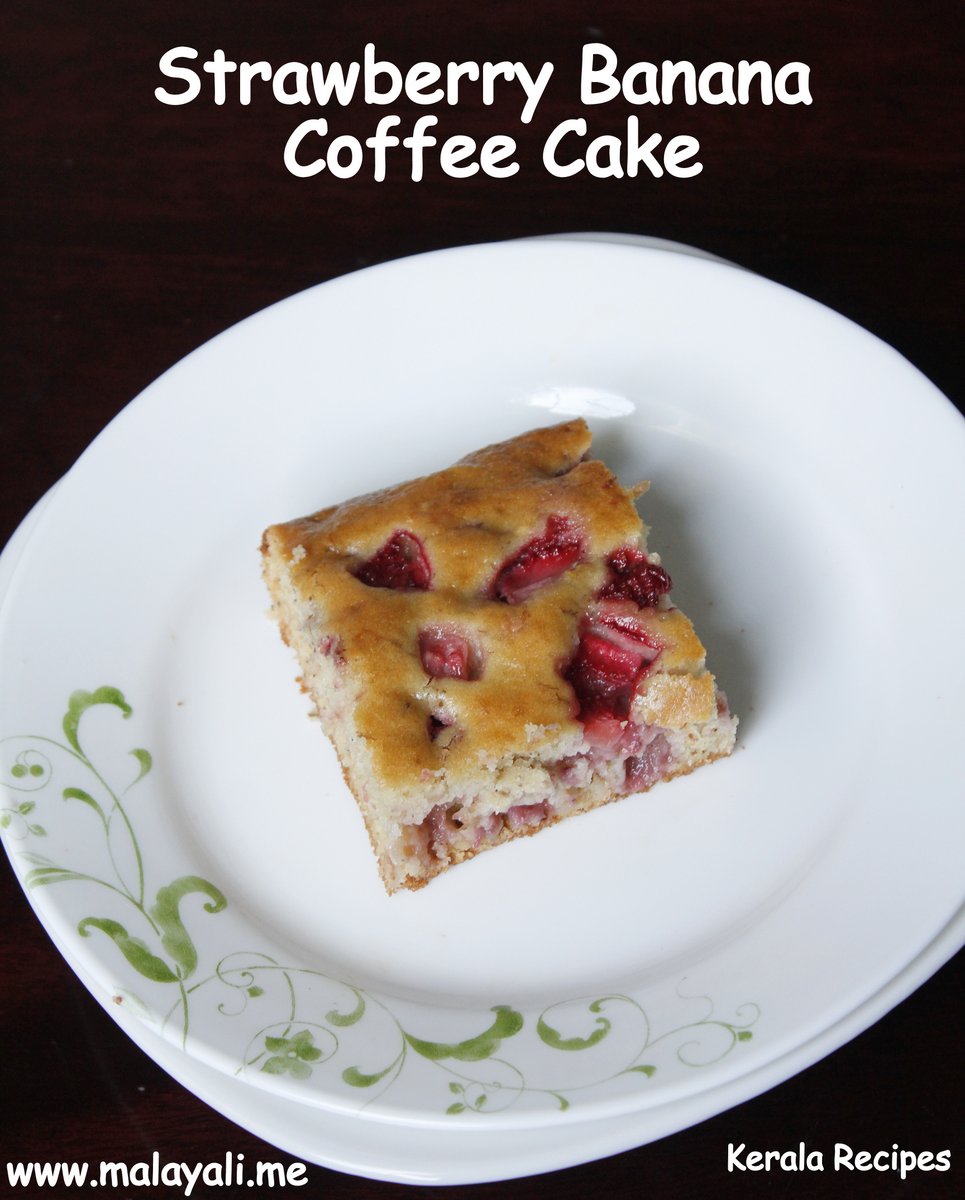
Strawberry Banana Coffee Cake

Strawberry Banana Coffee Cake

Ingredients

  1. All Purpose Flour – 2 cups
  2. Sugar – 1 cup + 1 tbsp
  3. Baking Powder – 1.5 tsp
  4. Baking Soda – 1.5 tsp
  5. Salt – 1/2 tsp
  6. Chopped Strawberries – 1.5 cups
  7. Ripe Bananas – 2 large (the riper the better)
  8. Eggs – 2
  9. Milk – 1/2 cup
  10. Canola Oil – 1/2 cup
  11. Warm Water – 1/2 cup
  12. Liquid Vanilla Extract – 1.5 tsp

Preparation Method

  1. Preheat oven to 350 degrees F (180 degrees C) and place rack in the center of the oven. Lightly grease a 9 x 13 inch (23 x 33 cm) pan with little oil or use a non stick spray. Set aside.
  2. Wash the strawberries and chop it into bite size pieces. Combine with 1 tbsp sugar and keep it aside.
  3. In a large bowl, sift the flour, sugar, baking powder, baking soda, and salt. Whisk until combined. Do not skip the sifting portion because I am warning you. It will be really unpleasant if you bite into a lump of baking soda.
  4. In another large bowl, mash the overripe bananas. Whisk together the eggs, mashed bananas, warm water, milk, oil, and vanilla extract.
  5. Add the dry ingredients to the wet ingredients and stir until combined.
  6. Next, fold in 1 cup of the strawberries to the batter. Mix gently.
  7. Pour the batter into the prepared pan and distribute the remaining 1/2 cup of strawberries evenly over the cake.
  8. Bake for about 35 to 40 minutes or until a toothpick inserted in the center of the cake comes out clean. I used a non-stick baking pan and baked the cake for 35 minutes.
  9. Remove from oven and let it cool. Enjoy!


Spicy Chicken Pasta in Cream Cheese Sauce

$
0
0

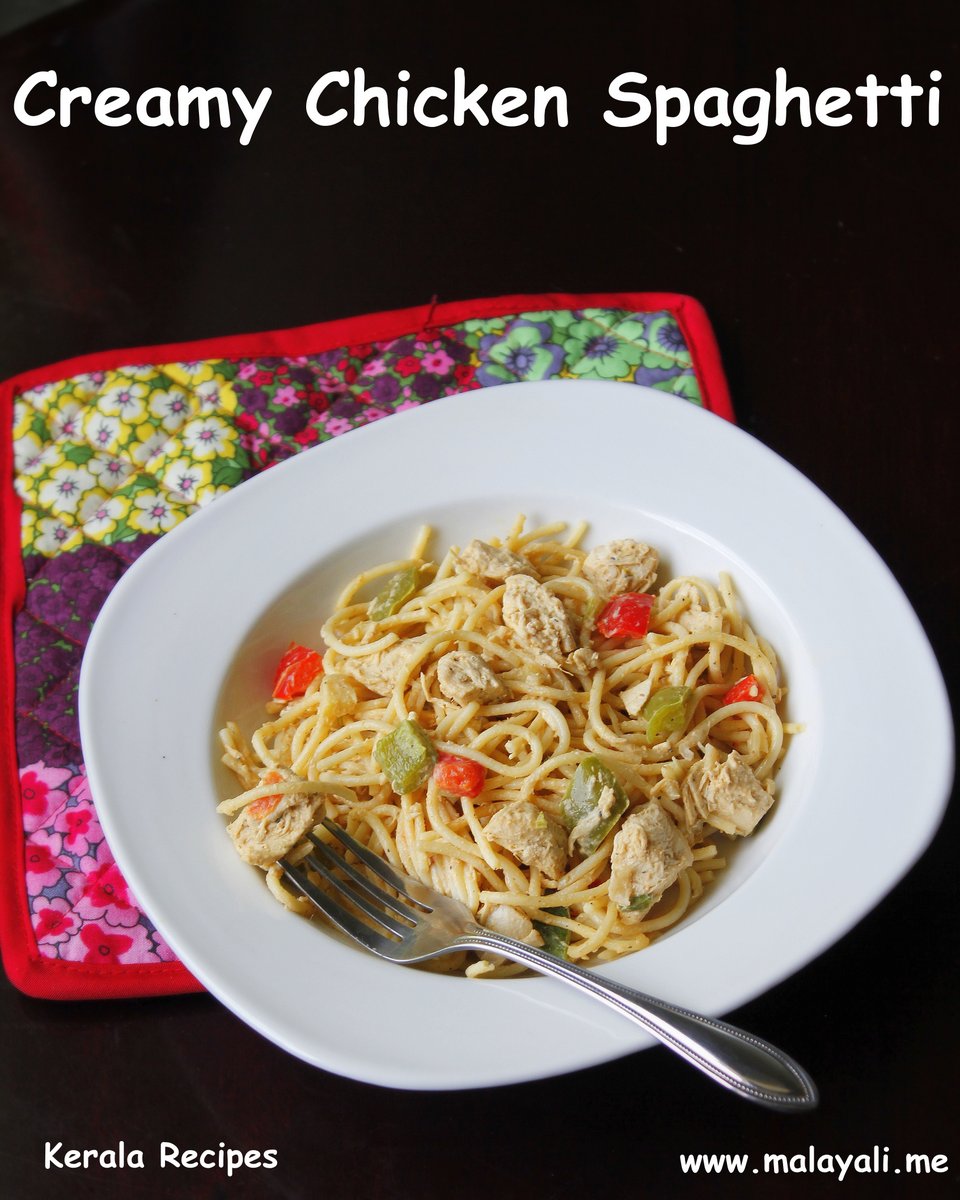
My toddler loves pasta particularly spaghetti or “Noondles” in toddler language. It is wonderful to see your little one trying to chow down spaghetti making a huge mess. These days I cook Chicken Breast on weekends and use it in different recipes throughout the week. It is great to have cooked chicken in your fridge so that you can use it in your pasta, soups, sandwich and so on. I boil the chicken just like I do it for Chicken Salad. I have used the cooked chicken as well as the spicy broth in this recipe.

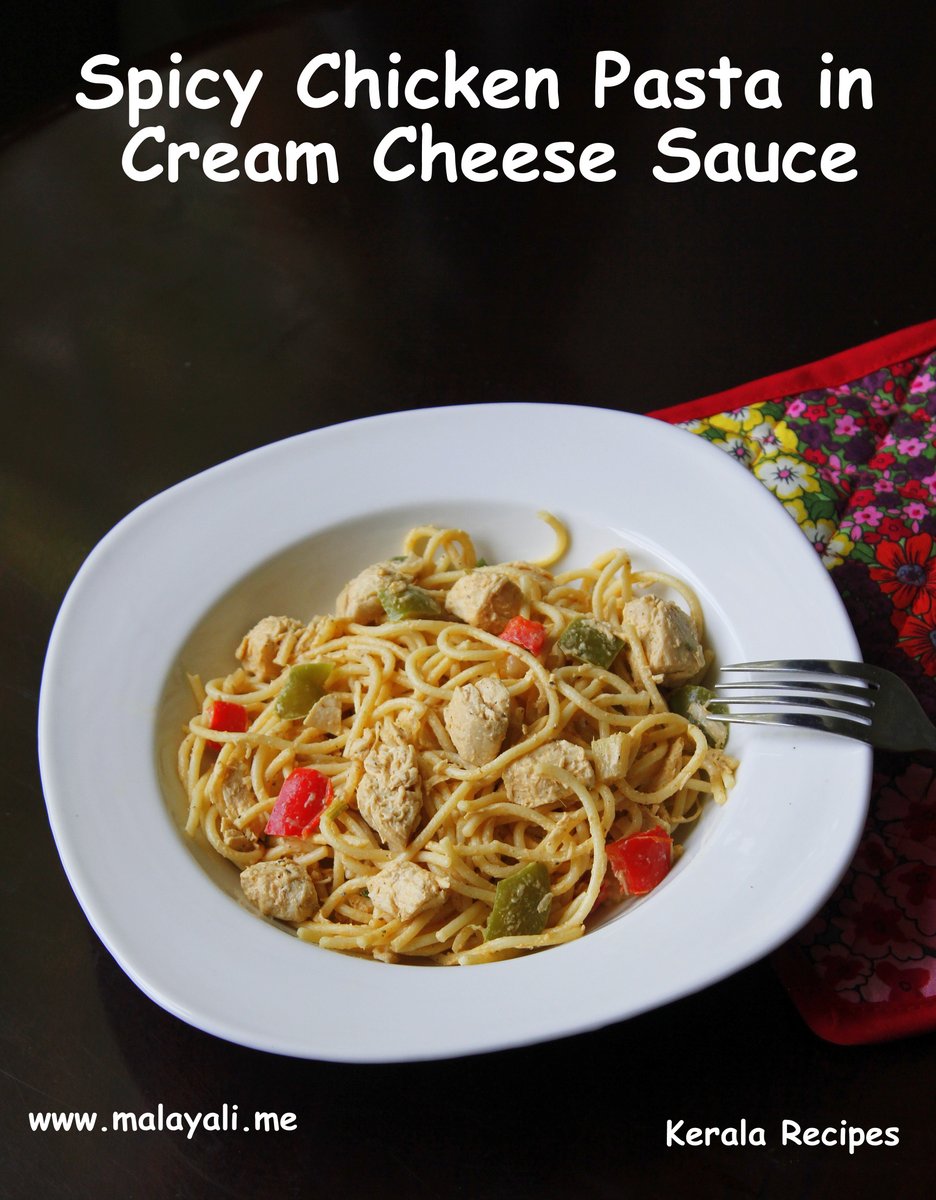
Spicy Chicken Pasta

Spicy Chicken Pasta in Cream Cheese Sauce

Here is the recipe for a spicy chicken pasta in a flavorful cream cheese sauce.  I have used Piri Piri hot sauce for an extra kick. We have been hooked onto Piri Piri sauce after Nando’s. This pasta is only lightly coated in sauce. The flavors from cream cheese and chicken broth make it wonderful. You can add more cream cheese for a heavier sauce. This sauce tastes similar to Alfredo Sauce except that it is lighter.

Creamy Chicken Pasta

Creamy Chicken Pasta


Ingredients

  1. Pasta of your choice – 1 lb (I used Spaghetti)
  2. Cooked Chicken Breasts – 3 cups (diced into medium sized pieces)
  3. Diced Bell Peppers – 1 cup (I used both red and green varieties)
  4. Diced Onions – 1 small
  5. Chopped  Mushrooms – 1 cup
  6. Minced Green Onions – 1/4 cup
  7. Softened Cream Cheese – 1/4 cup
  8. Chicken Broth – 1 cup
  9. Milk – 1 cup
  10. Piri Piri Sauce – 1/2 tsp (Use any hot sauce of your choice)
  11. Black Pepper powder – 1/2 tsp
  12. Garlic powder – 1/2 tsp
  13. Butter – 2 tbsp
  14. Salt – as needed
  15. Sugar – 1 tsp

Preparation Method

  1. Bring lightly salted water to a boil in a big pot. Cook pasta according to the instructions on the packet. Drain and keep aside.
  2. While the pasta is cooking, heat 2 tbsp butter in a large saucepan and sauté the onions until translucent.
  3. Throw in the mushrooms and bell peppers. Sauté on medium heat until cooked but firm.
  4. Add the diced chicken breasts to the pan and sauté for a few more minutes.
  5. Reduce heat and add black pepper powder, garlic powder and piri piri hot sauce.
  6. Add the softened cream cheese, milk and chicken broth to the pan. Stir until the cream cheese melts and there are no lumps.
  7. Add 1 tsp sugar and little salt to taste. Simmer for a few minutes until the sauce thickens.
  8. Throw in the diced green onions to the pan.
  9. Add the spaghetti to the pan and toss everything until the noodles are coated with the sauce.

Note

  1. You can use store-bought chicken broth instead of homemade broth.
  2. Instead of boiled chicken, you can bake, saute or grill chicken breasts. For an easier alternative, try rotisserie chicken.

Mushroom and Egg Kothu/Kottu Roti

$
0
0

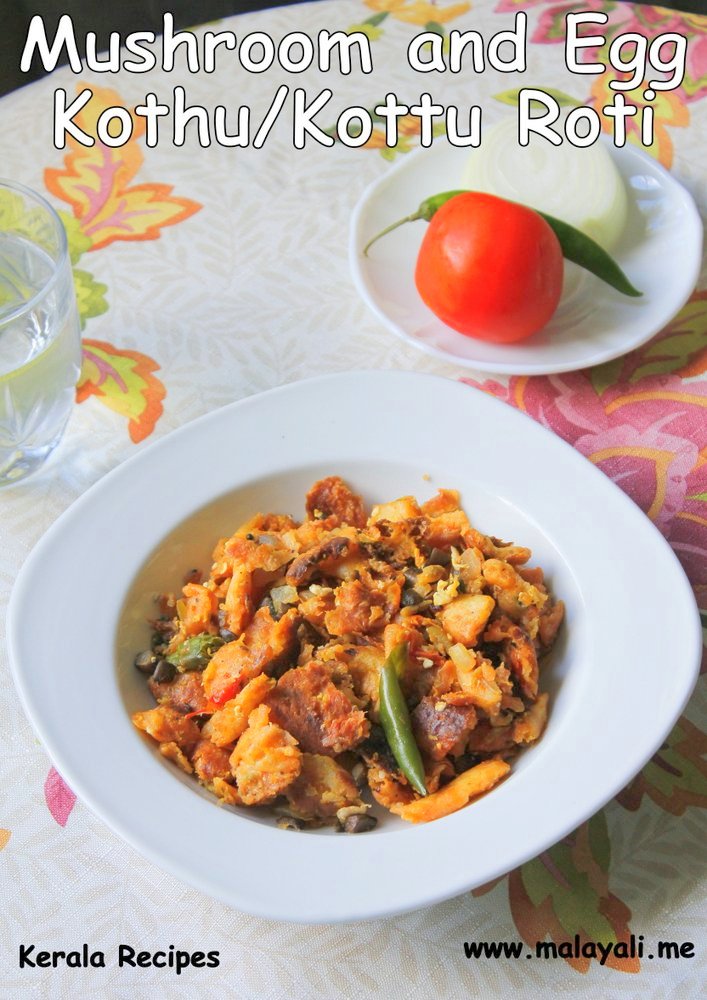
Kothu Roti is a popular street food in South India as well as Srilanka. It’s a very good way to turn leftover Roti (Indian Bread) and any meat curry into a new dish. I have tried different varieties of KothuRoti like Chilly Chicken Kothu Roti, Egg KothuRoti, Mixed Vegetable KothuRoti and so on from different restaurants.

Mushroom and Egg Kothu Roti

Mushroom and Egg Kothu Roti

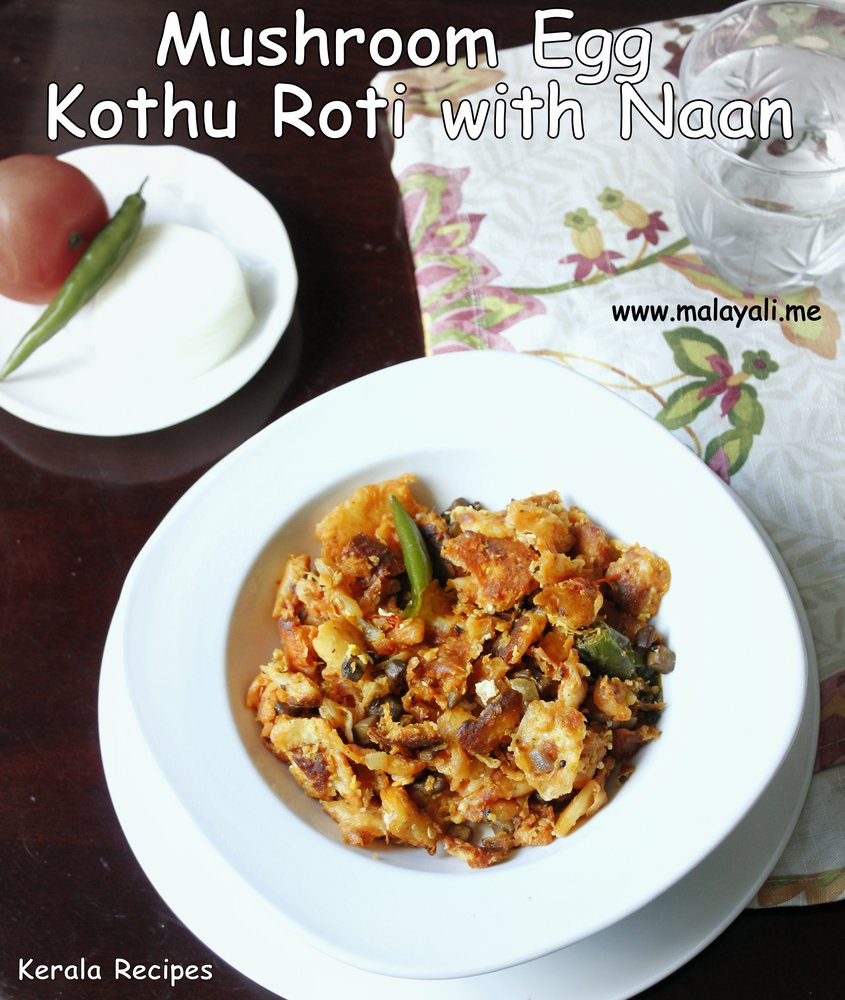
A few years ago, I  made Kothu Parotta using Kerala Porotta. Last weekend, we had some leftover Naan in the fridge and it had dried up a bit. I decided to turn it into Kottu Roti so that we wouldn’t have to deal with hard and chewy Naan. Since I didn’t have any meat based curries, I decided to use mushroom and eggs to make a newer version of Kothu Roti. We had it for Breakfast on Sunday and it was yummy and filling. If you happen to have leftover Indian flat-bread (roti) like Porotta, Naan, Kulcha, Tandoori Roti etc., turn it into Kothu Roti and you will have an awesome dish for breakfast or tea-time.

Mushroom Egg Kothu Roti

Mushroom Egg Kothu Roti

Ingredients

  1. Naan – 4 medium
  2. Diced Onions – 1 medium
  3. Slit Green Chillies – 2
  4. Chopped Tomatoes – 1
  5. Chopped Mushrooms – 1/2 cup
  6. Red Chilly Powder – 1 tsp
  7. Black Pepper Powder – 1/4 tsp
  8. Canned Tomato Sauce – 2 tbsp (I used seasoned tomato sauce)
  9. Sweet Chilly Sauce – 1 tbsp (I used Thai variety)
  10. Eggs – 2
  11. Grated Coconut – 1/4 cup
  12. Oil – 2 tbsp
  13. Salt – to taste

Preparation Method

  1. Heat oil in a big non stick pan and saute onions and green chillies until the onions turn translucent.
  2. Add the diced tomatoes and cook until soft and pulpy.
  3. Throw in the chopped mushrooms. Saute on medium heat for 5 minutes until it begins to brown.
  4. Reduce heat and add red chilly powder. Stir fry for a minute.
  5. Add tomato sauce along with salt to taste and mix well.
  6. Throw in the roughly torn Naan pieces and shredded coconut. Stir fry on medium-high heat for a few minutes.
  7. Break eggs and add it to the pan. Scramble thoroughly until the eggs are cooked and mixed with the Naan.
  8. Add the sweet chilly sauce and black pepper powder to the pan. Toss everything together and remove from heat.

Grilled Egg and Mozzarella Breakfast Sandwich

$
0
0

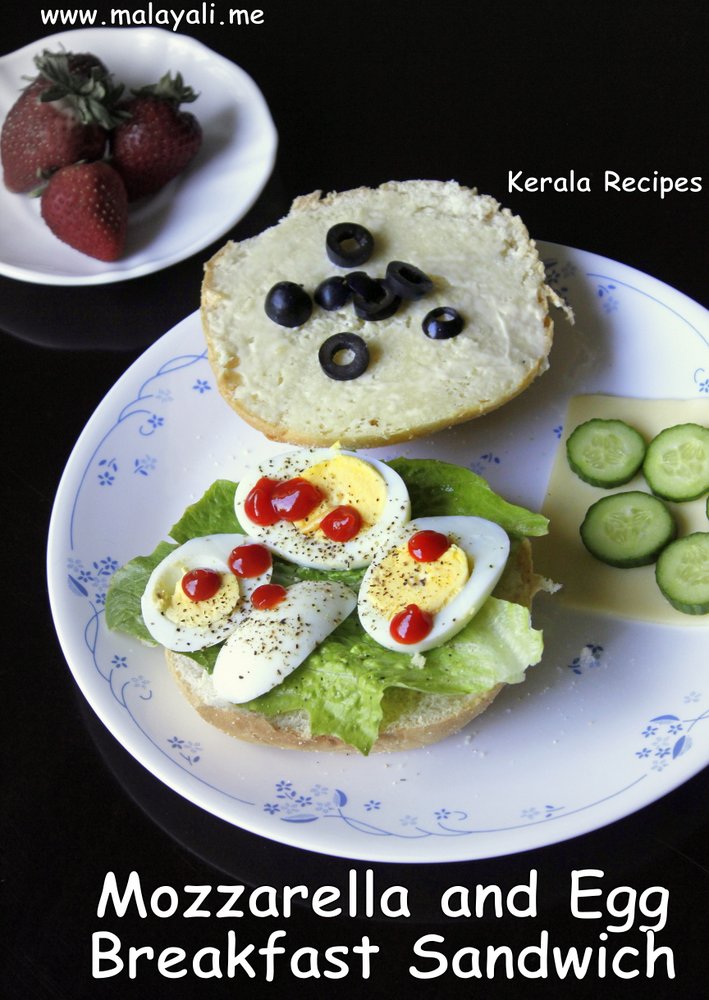
Boiled eggs and melted mozzarella on a Kaiser bun make a fancy restaurant style Breakfast Sandwich. I don’t have a Panini maker but I do have a George Foreman indoor grill and once I assemble the sandwich, I place it on the grill for a couple of minutes to toast it and the cheese melts to perfection. I even pack this for my husband’s lunch on busy days.

Mozzarella Egg Breakfast Sandwich

Mozzarella Egg Breakfast Sandwich

The key is to use a quality bun like a Kaiser or at least a fancy hamburger bun. I didn’t have bacon but I am sure it would have made it perfect. You can add toppings you like such as cucumbers, tomato, lettuce, pickles etc. For a lazy Saturday morning breakfast, try out this awesome boiled egg and cheese sandwich instead of heading to Tim Horton’s or McDonald’s for breakfast.

Grilled Egg and Mozzarella Sandwich

Grilled Egg and Mozzarella Sandwich

Ingredients

  1. Boiled Egg – 1 (Slice it lengthwise into 4 pieces)
  2. Mozzarella Cheese – 1 slice
  3. Romaine Lettuce – 1 small piece
  4. Sliced Cucumbers – as needed
  5. Sliced Black Olives – as needed
  6. Mayonnaise – as needed
  7. Ketchup – as needed
  8. Honey Mustard – as needed
  9. Salt – to taste
  10. Pepper – to taste

Preparation Method

  1. Spread mayonnaise on the top half of the kaiser bun. Arrange olives on top.
  2. Place a slice of mozzarella cheese followed by sliced cucumbers on top of the olives.
  3. Spread honey mustard on the bottom half of the bun and place lettuce, followed by slices of boiled egg.
  4. Season the eggs with salt and pepper. Drizzle ketchup to taste.
  5. Preheat your grill. Assemble the sandwich and grill it for 3-4 minutes so that the cheese melts. Alternatively, if you don’t have a grill, heat a skillet. Butter the bottom of the sandwich and place it in the skillet. Cover and toast for 2-3 minutes on medium heat so that the cheese melts.

Notes

  • My husband likes his sandwich spicy, so I add Piri Piri Hot Sauce along with ketchup.
  • If you are packing this for lunch to school or work, make sure the sandwich cools down completely before placing it in the lunch box so that the sandwich doesn’t get soggy.


Lettuce Thoran (Kerala style Lettuce and Coconut Stir Fry)

$
0
0

I haven’t been a lover of Salads. I occasionally have salad but to me it still tastes foreign. Even though I love veggies, Lettuce is one veggie which I find hard to like. I often buy Lettuce dreaming about making some awesome-must-try salad but usually it sits in the fridge for a long, long time.

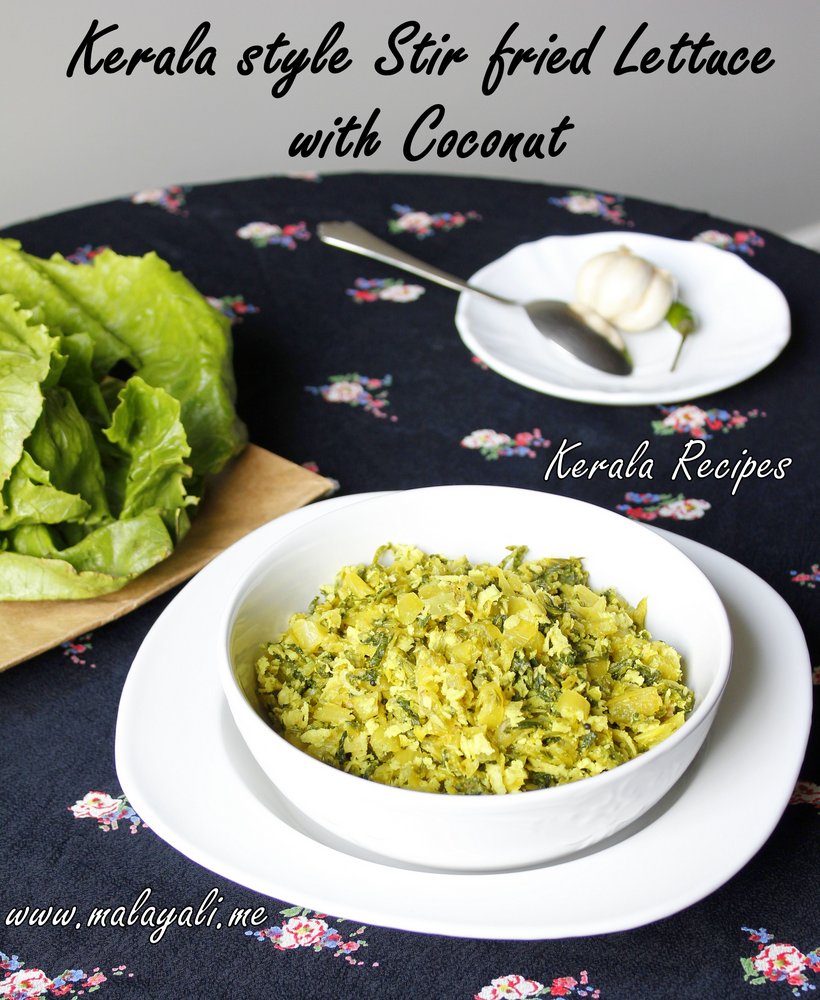
Kerala style Lettuce and Coconut Stir Fry

Kerala style Lettuce and Coconut Stir Fry

During my mother’s visit to the US, she suggested that I make a Kerala style thoran with Lettuce. She had made Lettuce thoran when she was in Dubai and tried convincing me to do the same. I was quick to dismiss her suggestion as silly because you know people use Lettuce only in salads. You don’t cook lettuce! End of Story!

A few months later, my mother got the chance to make Lettuce Thoran while at my sister’s house and this time I knew she was serious about it. When my sister raved about it, I knew I had to try this funny sounding Lettuce Thoran. Well…. you know the end of the story this time, right? The lettuce thoran turned out awesome and I instantly felt completely naive and ignorant about Lettuce. I should have listened to my mother’s suggestion rather than allowing many bags of Lettuce to rot in the fridge.

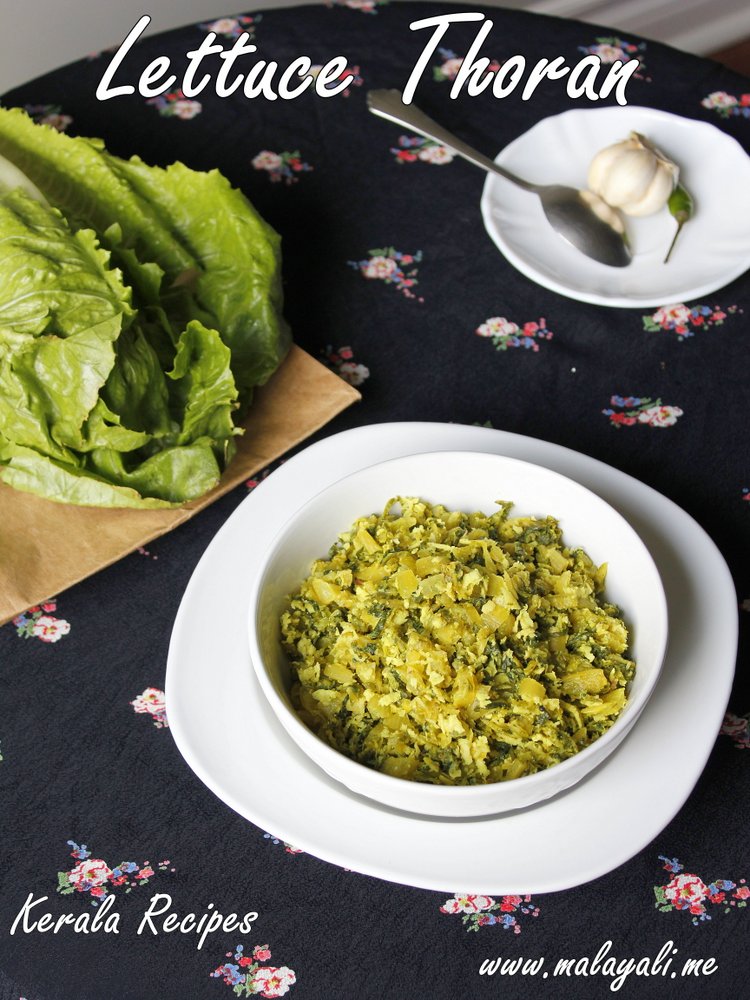
Lettuce Thoran

Lettuce Thoran

If you ever need to make a side dish with Lettuce, search no more. You can try this wonderful Kerala style Lettuce and Coconut Stir Fry. Serve it with Rice or spread it on a tortilla while you make a wrap. I know it’s hard to find Lettuce in India but do try this recipe if you get a chance.

Ingredients

  1. Romaine Lettuce Hearts – 3 big clusters
  2. Diced Onions – 1 small
  3. Crushed/Finely Chopped Garlic – 3 or 4 cloves
  4. Slit Indian Green Chillies – 2
  5. Grated Coconut  – 3/4 to 1 cup
  6. Coconut Oil – 1.5 tbsp
  7. Mustard Seeds – 1/2 tsp
  8. Turmeric – 1/4 tsp
  9. Curry Leaves – A small sprig
  10. Salt – to taste

Preparation Method

  1. Wash the lettuce thoroughly. Trim the base of each cluster and separate the leaves. Chop the leaves and stem into small pieces.
  2. Heat 1.5 tbsp coconut oil in a non stick pan and splutter mustard seeds.
  3. Saute the onions, curry leaves, garlic and green chilies on medium heat until the onions turn translucent.
  4. Next add the chopped lettuce to the pan along with salt to taste. Saute for around five minutes. Do not cover the pan!!!
  5. The lettuce would have let out water. Add the coconut mixture to the pan along with 1/4 tsp turmeric.
  6. Increase heat to medium-high and saute for 3-4 more minutes so that the water evaporates.
  7. Once cooked, the stems should be tender. Serve with rice.

Oats and Banana Cake

$
0
0

September 8th is the Nativity of the Blessed Virgin Mary, a big feast in the Church. In Kerala, Catholics prepare for our Blessed Mother’s feast day by fasting or abstaining from meat for 8 days known as ‘Ettu Noyambu‘. Yesterday, I wanted to make a cake for Mama Mary’s birthday. I didn’t have any plans and began searching for ingredients in my pantry. I had some overripe Bananas in the fridge and Oats in the pantry. Decided to bake an impromptu cake to celebrate our Blessed Mother’s birthday and surprisingly it came out well.

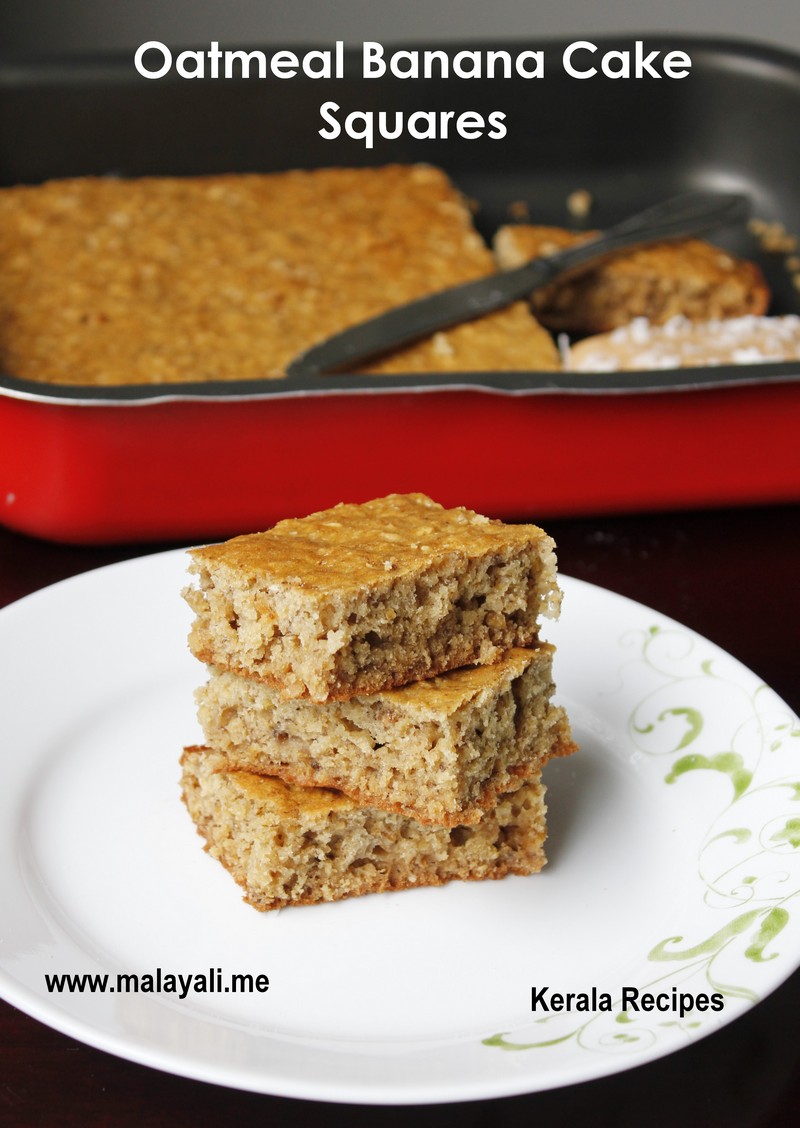
Oatmeal Banana Squares

Oatmeal Banana Squares

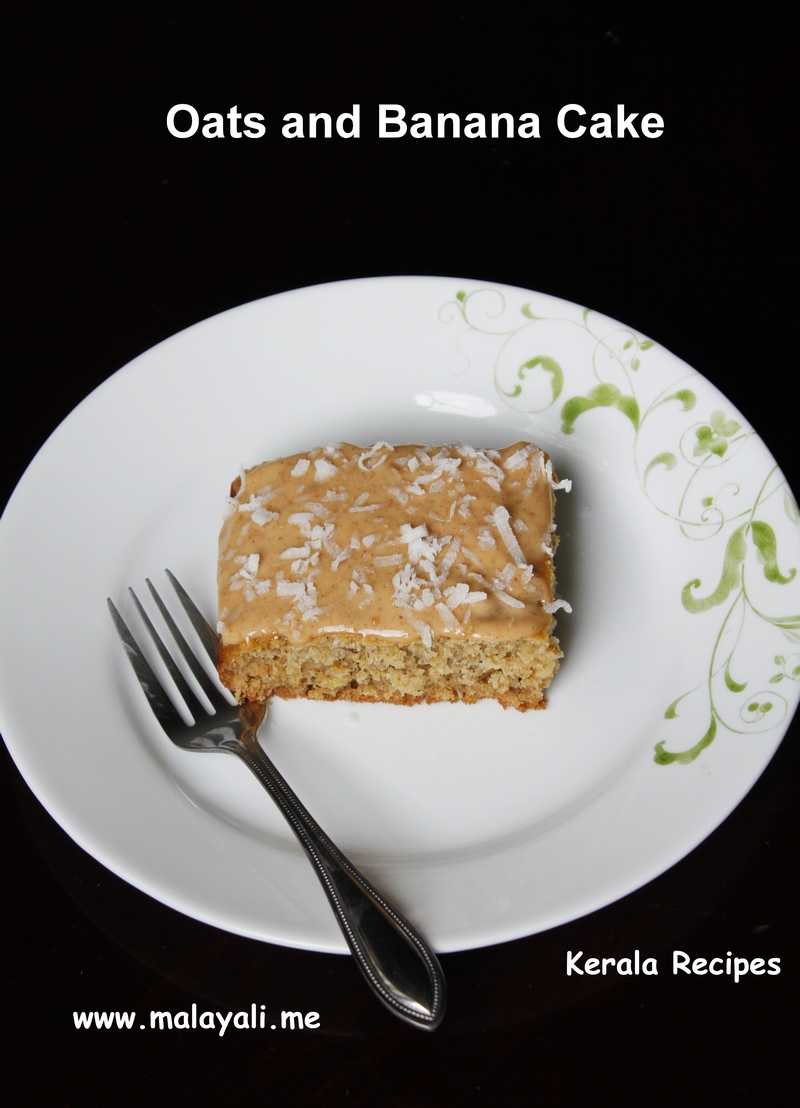
I tweaked the recipe I normally use for Banana Cake to include Oats to make it a tad more healthier. This cake tastes good straight out of the oven but I decided to be a little fancy and made a frosting using Yogurt and Peanut Butter. Just mix peanut butter, yogurt, honey and sugar until smooth and you have a frosting! Spread it on this lovely Banana Oatmeal Cake and you are all ready to serve it for Breakfast or as an after-school snack.

Oats and Banana Cake

Oats and Banana Cake

I sprinkled some Coconut flakes on top of the frosting simply to enhance the looks. The recipe is simple and easy to make. Just mix everything and you are ready to go. My mom and sister tried this cake yesterday and so I am pretty confident that I can share this recipe with you all. Here are some pretty flowers for our dear Mother and the recipe for a simple and humble cake just like the Blessed Virgin Mary.

Blessed Virgin Mary

Happy Birthday Mama Mary!

Ingredients

  1. All Purpose Flour – 1 1/3 cups
  2. Quick Cooking Oats – 1.5 cups
  3. Ripe Bananas – 3 medium
  4. Eggs – 2
  5. Pure Vanilla extract – 1 tsp
  6. Butter – 6 tbsp
  7. Warm Milk – 1/2 cup
  8. Warm Water – 1/2 cup
  9. Sugar – 3/4 cup
  10. Salt – 1/4 tsp
  11. Baking Powder – 1.5 tsp
  12. Baking Soda -1 tsp
  13. Cinnamon Powder – 1/2 tsp
  14. Nutmeg Powder – 1/2 tsp
  15. Cardamom Powder – 1 tsp

Preparation Method

  1. Preheat oven to 350 degrees F (180 degrees C) and place rack in the center of the oven. Lightly grease a 9 x 13 inch (23 x 33 cm) pan with little butter or use a non stick spray. Set aside. (I have used a non-stick baking pan while making this cake.)
  2. In a large bowl, sift the flour, sugar, baking powder, baking soda, cinnamon, nutmeg, cardamom and salt. Do not skip the sifting portion because it will be really unpleasant if you bite into a lump of baking soda.
  3. Add oats to the bowl and whisk the dry ingredients until combined. Keep aside.
  4. Microwave the butter for around 30 seconds so that it melts.
  5. In another large bowl, mash the overripe bananas. Whisk together the eggs, mashed bananas, warm water, warm milk, melted butter and vanilla extract.
  6. Add the dry ingredients to the wet ingredients and stir for around 2 minutes until combined. The batter will be on the watery side.
  7. Pour the batter into the prepared pan and distribute evenly.
  8. Bake for about 25 to 30 minutes or until a toothpick inserted in the center of the cake comes out clean. I used a non-stick baking pan and baked the cake for 25 minutes and it was done.
  9. Remove from oven and let it cool. Enjoy!

Notes

  • I prepared a simple frosting by stirring 2 tbsp Peanut Butter, 1 tbsp Yogurt, 1 tbsp honey and 2 tbsp sugar to form a smooth and thick mixture.
Viewing all 64 articles
Browse latest View live